Chronic Dry Eye Part II

So for those of you that read the prequel to this post, you’ll remember that I have already professed that this publication is neither medically affirmed nor written by a medical professional. The account here is simply my story. 

My weeping, whining, bloodshot eyes were getting me down and once I received a professional diagnosis, I was hopeful that my symptoms of chronic dry eye could soon be alleviated. I began my new routine by drinking more water (none of us are ever drinking enough, really) and added drops from the eye care aisle at Walgreens to my morning, noon, and evening grooming regime. I was careful not to overdo it on the eye drops even though I would have loved to just keep squeezing the cooling lubricant into my eyes throughout the day. My optometrist warned me against this, noting that overusing eye drops containing preservatives can actually increase dry eye symptoms…annoying. I boosted the amount of moisture my humidifier was producing and was adamant about conscientiously blinking; being sure to completely close my eyes with every downward drop of my upper lid. I’m sure I looked like a muppet, but heck, if flutter blinking was an agitator, then it too, was being addressed.

After a month of upped hydration, routinely applied eye drops and calculated blinking, I returned to the optometrist for an update. I felt better, my eyes looked better, and… I failed the dry eye exam a second time. The doc did say my corneas were clearer, meaning they were healing, but I still wasn’t out of the woods. With winter coming and humidity levels continuing to drop, she prescribed an OTC medication. I haven’t been on a prescribed drug in YEARS and was very hesitant to try this route but after discussing my other options, I agreed to a month-long trial.

In truth, Xiidra, the prescription I tried, did make my eyes feel better. My biggest issue with the medicine was the wasteful packaging. Every morning and each evening I would snap open a single-use plastic tube and press the liquid contents into my eyes. Then I would toss the unrecyclable container into the rubbish bin. Not ideal…but my eyes were feeling refreshed rather than raw after just eight days of use.

Waking up was no longer torturous and the redness around my lids really did begin to recede. My vision was still photosensitive, but I was no longer sacrificing one to the sunlight while commuting. My earth conscience was nagging me, but I knew I could do a lot more to help the planet if I wasn’t constantly distracted by my agitated eyes. I got used to the unpleasant side effect of tasting the eye drops (our tear ducts drain into our esophagus, kids so what’s in your eyes eventually ends up in your stomach after passing over some far back taste buds) and had a mason jar filled with the used dropper tubes in hopes of finding a way to repurpose them as my trial came to an end. With this resolution in mind, I went to the pharmacy to fill out my next month’s prescription.

That is when it became immediately apparent that this prescribed route was not going to work for me. The insurance company that I was covered by at the time decided that Xiidra was a last resort option. Before they would help cover this $500/month prescription, I had to first try an alternate route and surgically implemented tear duct plugs was one of the mandatory, pre-approval options. My insurance was willing to financially assist in an invasive medical procedure, but couldn’t help with my OTC drops. I called my optometrist office immediately and was relieved to hear that there were ways of disputing the insurance company’s decision.

One of the office managers helped me fill out an insurance appeal form and my optometrist very generously offered free samples of both Xiidra and its alternative brand, Restasis, to the best of her abilities as we waited for a reply from the insurance provider. When the response letter finally arrived I was devastated to learn that my appeal had been rejected; the only way my provider would help cover Xiidra was if I tried (and failed) the “punctal plugs” first. I did some quick research on these tear duct blocks and read numerous articles about their benefits alongside myriad criticisms of their inability to provide relief. The idea of plugging any orifice in or around my eyes sounded terrible, and I decided right then and there (as I ripped up the letter) that if I wanted my eyes to improve, I was going to have to do it on my own. Western medicine, be damned.

I’m all for standing up against big pharma and conglomerate health companies. Health insurance in the USA is a complete and utter disaster and people are getting screwed royally on a daily basis. I could have re-appealed their rejection and very possibly persuaded the decision in my favor had I chosen to fight. I decided to drop the case instead because the idea of being on Xiidra for the foreseeable future really wasn’t an ideal solution for my lifestyle. I didn’t like the dependent relationship I was developing with these artificial tears and I really despised the wasteful packaging. I was also aware that I would be in limbo without the filled prescription while the dispute proceeded (and my symptoms would undoubtedly return) so I called my optometrist, cancelled my upcoming appointment, and hit the World Wide Web.

Between Pinterest, WebMD, medical journals, and health articles discussing chronic dry eye, I developed a regime that worked for me. Just today I was in Portsmouth’s Book & Bar around noon, with the sunlight streaming through the windows, scanning the shelves, and I wasn’t cringing. I think back to how my eyes would have reacted to that same scenario a year ago and I can’t help but smile. I feel like I’ve been given my eyes back. My vision, while far from perfect, is the lifeline to my heart. Literature is pretty close to being my everything and I feel so blessed to have found a way to manage my chronic dry eye without going bankrupt or going against my morals. Here is what worked for me:

Back when my eyes were horrendous, I began putting drops of castor oil in them at night before bed. Castor oil is derived from the castor bean plant, a really beautiful tropical shrub whose seeds or ‘beans’ look alarmingly similar to ticks. The husk, or shell, of these seeds is lethally toxic if ingested, but the oil we use does not contain the husk, and as such, is safe to use both externally and internally (in moderated doses!). It is mentioned on numerous holistic websites as a remedy for dry eyes, dry skin, dandruff and even hair regrowth.

Castor oil is thick and sticky, more like syrup than oil in regards to its consistency, but the immediate relief it brought to my eyes the first time I tried it was almost sinful. Ladies, recall that blissful feeling of stepping out of heels after a solid hour plus of standing/prancing/saving the world in them. Evoke that feeling for a moment: you know the one I’m talking about. The one that happens when you take your first flat-footed step post-elevated agony and your body lets out an involuntary sigh…that happens to your eyes when castor oil is applied.

Castor oil really needs to be used during the evening because its tacky consistency makes seeing through it a bit, er, difficult. Also, that viscosity makes it near impossible for your tear ducts to drain (excellent!) but it also means that eventually the oil works its way out of your eyes. Be aware that it will end up on your sheets, pillowcases and anything else you’re putting near your face while you sleep. For those of you, who like me, still snuggle with a stuffie on occasion (read: nightly) note that you’ll need to wash these items more regularly than once every decade. #justkiddingnotreally #eeyore

To my knowledge, castor oil doesn’t stain like many other oil-based solutions, but my preferred bedding fabrics are fleece, cotton and flannel and they hold up to pretty much anything I smear/slather/drop on them (face cream, lip balm, conditioner, wine, etc.). I cannot personally speak for silk, but I imagine castor oil might not bode well with that delicate material.

my dry eye treatment team!

In addition to my new nighttime castor oil routine, I also purchased a box of single-use, preservative-free, Mega-3 eye drops by Refresh Optive (this particular product is specially designed for dry eye syndrome). These I administered the same way as the Xiidra brand prescription drops: one tube in the AM and one tube in the PM. I also began to pretty aggressively scrub my eyelids with my sensitive skin face wash, Cetaphil in an attempt to unclog any glands that might be backed up and thus, not excreting the appropriate amount of oils/mucus/tears. I know we wash our eyelids when we wash our faces, but I really sudsed it up in those eye cavities and figured out how to get into the tiny space between my eyelashes without irritating my actual eye. It took some practice, but I’ve got it down now and rarely ever feel the sting associated with the soap in the eye scenario. In addition to this daily cleanse, I would also swipe Q-tip soaked in witch hazel along my inner eyelids, top and bottom, after each wash. At first I was losing eyelashes, but after a couple weeks, they had all grown back and are no longer dropping when I scrub against them.

I brought sterile, lubricant eye drops to work and placed a drop in each eye at lunch and once again when I came home around 4:00 in the afternoon. I began taking a daily fish oil supplement and was meticulous about not missing a dose. I ditched the red wine (studies have shown red wine’s high sulfite content can irritate sensitive eyes) and chugged water alongside my coffee throughout the day. I also added additional fats to my diet: cream in my coffee, butter instead of olive oil in my cooking (butter is higher in both Vitamin A and D) avocado on my toast, and even bone broth with the fat included rather than skimmed off. I had several blood panels run the summer before this debacle so I knew what my baselines were in regards to cholesterol. I was okay to increase both my monounsaturated and saturated fat levels but would recommend to anyone considering changing their diet, to firstly run it by their primary care physician.

I operated under this precise routine for a total of ten weeks beginning in early December. By mid-February I was no longer using the Refresh single-use eye drops; I didn’t feel like I needed them and they were the priciest of my products. I replaced them with standard eye drops and limited myself to a total of no more than 4 drops, per day, per eye. By March I was no longer religiously applying castor oil (I’d become a bit sick of the sticky mess) and continued to wake without irritation. I no longer squinted under the fluorescents at work although my eyes were still terribly sensitive to sunlight.

With April came an increase in humidity as the rainy season began here in NH and I put my humidifier away with my snowshoes and thermals. May was a super busy month for me and as my stress levels increased, so too, did my dry eye symptoms. I started using the remaining packet of my Refresh drops, added the castor oil back into my evening bedtime routine, and things continued to improve once more.

When July brought the high heat, I shelved the castor oil for the summer. I was still taking my fish oil supplement and washing my eyes thoroughly at least once a day but I was no longer squinting through my fingers upon waking in the morning, nor was I blind to the backscreen of my phone if it illuminated in the night. I was hiking again, exposed to dry winds and hours of sunlight, and never once this past season did I feel the need to pause and administer drops although I did carry a bottle in my pack. I wasn’t particular with my brands anymore; seeking those I had coupons for over those I did not. While I tended to lean towards the products that contained the words ‘gel’ or ‘lipid’ I was only using them twice a day now so I wasn’t as reliant and thus, wasn’t as picky as before.

By September, a full year after my diagnosis, my photosensitivity had completely reverted to what I consider to be normal. I assumed that my symptoms would increase again as we entered the drier season and the furnaces kicked on once more. Because of this, I was able to be proactive. I purchased a new fish oil capsule that offered a higher content of omega-3’s and brought the castor oil out of the medicine cabinet and placed it next to my bed so it was readily available. I started carrying eye drops with me once more and applied them mid-day as well as morning and night. I held my breath through September and November when I was at my worst in terms of symptoms last year…when December came to an end just days ago, I rejoiced. My photosensitivity has yet to return, my eyelids haven’t stuck to my cornea since Fall 2017 and my eyes not only look healthy, they feel healthy as well.

I would be lying if I said that I cured my chronic dry eye. There are still days when I wake up and my eyes are noticeably less lubricated than they should be. There are mornings when one eye feels irritated as if I scratched it in my sleep. There are some days when my eyes are bloodshot and agitated for no explainable reason other than the fact that I have had dry eye syndrome and will always be a candidate for symptoms of dry eye, especially if I don’t diligently tend to my ocular health. I still blink like a weirdo but I can look directly at the moon again with admiration rather than discomfort. I still wear my sunglasses closer to dusk than most people I know, but I’ve always had mildly sensitive hazels and I no longer feel the need to wear them indoors. I’m acutely aware of the day-to-day condition of my eyes and their reaction to specific environments; because of this, I’m confident that I can continue to manage my chronic dry eye without pharmaceuticals. The less I worry about them, the less agitated they are and the less agitated they are, the less I worry about them.

Chronic dry eye was a challenge that I was forced to face head on and I am so glad I took my health into my own hands. If you suffer from any of the above symptoms, I hope this post can be of help to you, but I must stress the importance of receiving a professional diagnosis first and foremost. There is a ton of information available to us and more research going into chronic dry eye as it becomes a common condition in the USA.  Do your research, be your own advocate, and know that you are not alone! The more we collaborate, the greater the chance of success. Here’s to good health, open minds and sparkly eyes!   

Selfie #3…the sacrifices I make (to my ego) for you readers! Here I am in sunlight. without sunglasses…no weeping, no squinting! January 2019. #myhealthmybody #chronicdryeye #igotthis

Chronic Dry Eye DIY: Part 1

Last year I was diagnosed with Chronic Dry Eye Syndrome. I had no idea that having dry eyes was a “diagnosable” situation having always just chocked it up as annoying and not worth much mention.

I get dry eyes in the winter, in sync with the furnace kicking on and humidity levels dropping in queue with the thermostat here in New Hampshire. Most of us experience a physical reaction to the reduced air moisture. Many of us complain of dandruff, eczema, nosebleeds and other lovely bodily ailments that never seem to make it into those posed holiday cards. Go figure. In the past, I have mitigated my dry eyes (and nose, throat, etc.) by keeping a humidifier running in the bedroom overnight. When I went to the optometrist in early November thinking my suddenly sensitive eyes could be an infection of sorts, it never crossed my mind that the dryness of my eyes might be the culprit behind a series of recent ocular issues.

It was right around the first week of September (I was 31) when I began to develop some pretty serious photosensitivity. For those of you unfamiliar with that fun word, it can be summed up as follows: photosensitivity means your eyes shrivel up inside of their sockets whenever they are exposed to bright light. Think of a vampire meeting a sunbeam and Buffy. Just kidding, you don’t need to recall Buffy, but you did! This light source can be synthetic (like a lamp, backlight, lantern), or natural (think sunlight, the moon, or fire). Photosensitivity isn’t particular to the origin of illumination.

In truth, your ocular orbs don’t actually shrivel up, but keeping them open to any light source on a bad day is like trying to encourage a toddler to do something they don’t want to: it’s difficult, messy and rarely successful. Ever get salt or citrus oils in your eyes? Yup. That was how I experienced photosensitivity. Attempting to keep my eyes open when exposed to natural light in particular resulted in some Olympian-strength-squinting paired with uncontrollable weeping (and of course, it’s siamese twin, nasal discharge aka dripping snot) and driving with only one eyeball open at a time since sacrificing both to the glaring light of day was a less painful option than colliding with a telephone pole. I exaggerate…but only just.

My eyes a year ago were so sensitive that I couldn’t turn on any lights in my house without firstly covering my sight orbs with my hands so I could filter it through my fingers. I had tension headaches from squinting and my eyes involuntarily closed when exposed to anything illuminated or reflective. Check a text in the dark: impossible. Drive at night with headlights beaming through the windshield: torture. Keeping them open and focused during my morning commute was harder than holding a plank for five minutes and I really did learn how to drive with a palm covering one eye before switching to the other when it became too painful for the current sacrificial ocular organ. I began wearing sunglasses both inside and out since the overhead fluorescents were as offensive as sunshine, and the more attention I gave to my sensitive eyes, the worse they seemed to get. It was miserable and it wasn’t getting better on its own.

When I say that I literally peeled my upper eyelid off of my eyeballs upon waking last year, I am not joking. Trust me, it felt as awful as you just did while reading that last sentence.

You’d think that sleep would be a reprieve. My lids could shade my wounded eyes and repair could take place during slumber. Unfortunately, that is not the case when you have chronic dry eyes. You see, when you sleep, your body continues to create that thin film of lubrication that coats your eye and keeps them, well, lubricated. For those of us who are already challenged by that autonomic function, the problem doesn’t take the night off.

When I say that I literally peeled my upper eyelid off of my eyeballs upon waking last year, I am not joking. Trust me, it felt as awful as you just did while reading that last sentence. And this, as it turns out, is where the real damage can occur. When our eyes aren’t properly lubricated, our eyelids can’t slide smoothly over the eye itself; and when our eyelids are sticking to our eyeball, and are physically pried off as a result, this can lead to cornea damage. for reals. I waited a month before booking an optometry appointment because I’m stubborn [read: stupid] and thought it would remedy itself. That putting-it-off period was a big, fat, f#$%ing oops on my part.

To better understand this dry eye hell I’m about to explore, let’s go over the basics of our eyeball lubrication system, shall we? Disclaimer: A.) I’m not sure that’s what Mr. Gray and friends refer to it as (eyeball lubrication system) but that is I’m coining it from here on out; B.) I am not a professional. I just had to learn a lot about eye anatomy and physiology in order to improve my own ocular health and this is what I learned.

We (like many other land mammals) have a microscopically thin, three-layered coating of lubrication that shields our cornea, the transparent outer layer of the eye that bends and refracts light. This layered coating is referred to as the tear film. So far, so good, right? Farthest from the actual corneal surface is the meibum layer, composed of a variety of lipid oils. Its main purpose is to prevent the middle layer, the aqueous layer (think tears), from dissolving too quickly. The last layer is flush with the surface of the cornea and is comprised of mucous. Yep, mucous. It is the last line of defense for the cornea (protecting it against microbes) and blends with the aqueous layer to prevent our tears from simply slipping right over our eyelids. Its mucilaginous properties add a viscosity to the tear film and aid in blinking since mucous is, well, you know…slimy. With me so far?

All three layers work in conjunction with one another to keep the cornea (and all the fleshy pink parts around the immediate eye) both lubricated and protected. For those of us with dry eyes, that lubrication (the tear film) is like a watered down cocktail: it contains all the active ingredients, but they’re not in proper proportions. Imagine a martini with 2.5 ounces of vermouth and a splash of gin, garnished with a full sized onion… yikes. Or a Bloody with 5 ounces of vodka, 27 olives and an ounce and a half of tomato juice…oh wait, that’s how I make mine #russian #heartburn.

In addition to our lubrication glands being dyslexic with the recipe book, it seems that many of us dry eye sufferers also have an overactive drainage system (tear ducts) so even if we were able to produce an effective combination of lipid oils, water and mucus, that blend is being removed from the eye too quickly to serve its purpose. Come on!  

More blinking = more tear film production, so what’s the problem?

So how does this relate back to sleep? Well, during the day it is our blinking that keeps these layers present and functioning. Blinking stimulates the excretion of oil, water and mucus from their respective glands. The up and down action of our blinking also helps to blend these elements and of course, wipe away any airborne detritus like dust or lint. Blinking is pretty crucial as we can all attest to. Interestingly enough, people with chronic dry eyes are reported to blink more frequently than the average person. You’d think that would mean our eyes are in great shape. More blinking = more tear film production, so what’s the problem? We do this, it would appear, because our lubrication system is so flawed that we try to make up for it by milking those glands to our best abilities through subconscious, repetitive blinking.

Unfortunately, because our tear film cocktail isn’t potent enough, the excessive blinking doesn’t help. Is there such a thing as too much blinking? Not to my knowledge, but you can blink wrong. How do I know this? Because I do… blink wrong, I mean. Failing a semi-autonomous body function? Way to go Willa! I am what they call a “flutter” blinker, meaning that while I do blink at a healthy rate, I close and reopen my eyes so quickly that my upper and lower lids don’t actually touch completely. Essentially, my blinks are both incomplete and unsuccessful, sort of like our current government. I blame my flutter blinks on FOMO; I just don’t want to miss a thing! Those of you with healthy eyes, you take blinking for granted, I assure you.  So back to the sleep scenario.

While we sleep, meibum, the oily liquid blend that composes the outermost layer of our tear film, assists in sealing our eyes closed for our night’s rest. You know that feeling when you’re just on the brink of sleep, eyes closed, dreams in reach, and then some annoying loved one (cat, dog, partner, child, ghost) pesters you and you have to pry your lids apart? It’s not just the fatigued muscles around your eyes that make it feel as though your lids are sealed together. It’s the meibum whose lipid constituents also contain wax. This wax creates a natural adhesive along the eyelids that aids in keeping them shut while we dream sweetly, unaware. Our eyes need to be shut during slumber in order to heal and repair from the day’s exposure to, you name it: wind, UV rays, airborne allergens, microbes, dust, etc. Your meibomian glands, I should note, are located along your inner eyelids, aka, the eyeliner landing strip. These glands remain active during sleep, even though blinking ceases.

Some scientists suggest that the meibomian glands are actually overactive during rest and this excess of meibum fluids solidifies into the sleepy seeds we get in the corners of our eyes in the morning. Some of you call it eye gunk but I’m sticking to sleepy seeds. It’s cute, like my pal Jon who introduced me to the term, and cute like the sandman used to be before I got older and recognized the moral flaws behind that notion. A weathered stranger breaking and entering our homes in order to screw with our subconscious while we’re conked out and oblivious to his presence… is that seriously expected to elicit sweet dreams? #nothankyou #nightterror

It’s safe for you to assume that us dry-eyed wonders don’t produce enough meibum at night; shoot, we can’t produce it properly during our waking hours. This can lead to our eyelids ineffectively sealing for our restful state which consequentially result in a complete drying out of the eye during those long hours of sleep. Waking sucks since our eyes are now watering and stinging as they try to compensate for the prior period of air exposure. I haven’t found any research to support it yet, but I imagine our REM sleep is affected as well since I can’t imagine our eyes can roll around subconsciously if they’re latched to an upper lid… More on that as I find supportive evidence.

My next blog will discuss what the doctors prescribed, what I tried, and how I now holistically manage my chronic dry eye. Stay tuned!

Country Ingenuity

Under the Deck Chicken Coop

I closed on my first house the week of Halloween a couple months before I turned thirty. I had with me all my worldly possessions: hand me down furniture, a beat up mattress from college and bins of photos from my prior travels. I also had with me a trio of gerbils and a small flock of hens. The feathered farts were delighted to find out I had yet to put up a run before their arrival and as such, exploited their freedom and were complete and total turds.

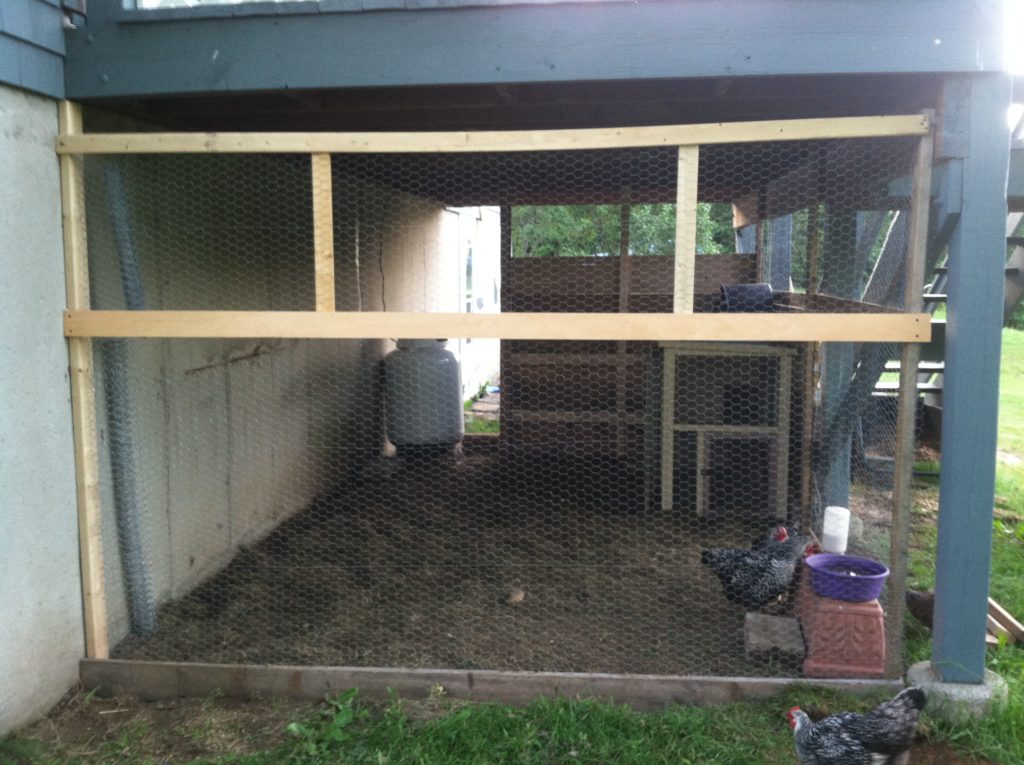
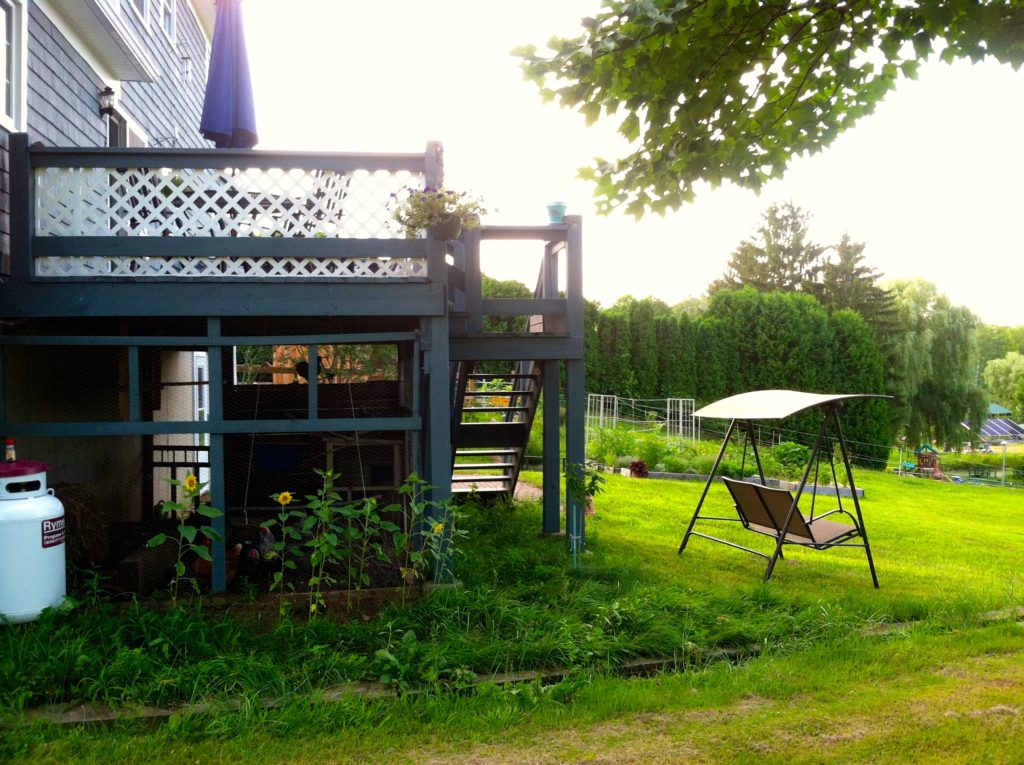
It was blatantly obvious that my girls would not survive long in the open meadows of the new place but I didn’t have the means to put up a standard framed coop, nor did I know where I’d like to position them on the property. So, I did what any crazy chicken person would do…I set my hens up under the back deck.

a Tractor Supply coop + some old paint = a fancy, schmancy henhouse! 

Their old coop was relocated so that it was flush against the foundation and with some ingenuity (read: baling twine and toddler fencing), the hens were contained (I use the word ‘contained’ loosely here) and protected from overhead predators until I could reassess in the spring. 

Having them so close that first winter was fantastic. At my last place I had to firstly shovel a path just to get to the coop before then shoveling out the coop in order to operate the doors. After this I would clear an area around their small fortress otherwise they’d stay in all day, vocalizing their disdain for the horrible white stuff on the ground outside, and make an awful mess.

Here, the 200-square-foot deck ‘ceiling’ caught the majority of the snow, leaving a dry pen underneath. The snow that fell around the deck created a natural fence line for my tender-footed, nomadic flock and I never played hide ‘n’ seek hen again that winter. As an added bonus, the basement door is approximately six feet from the deck overhang so there was no need to bother with shoveling a path to and from the coop. The hens were happy, I was happy, and by the time spring arrived I had decided to build a permanent run under the deck.

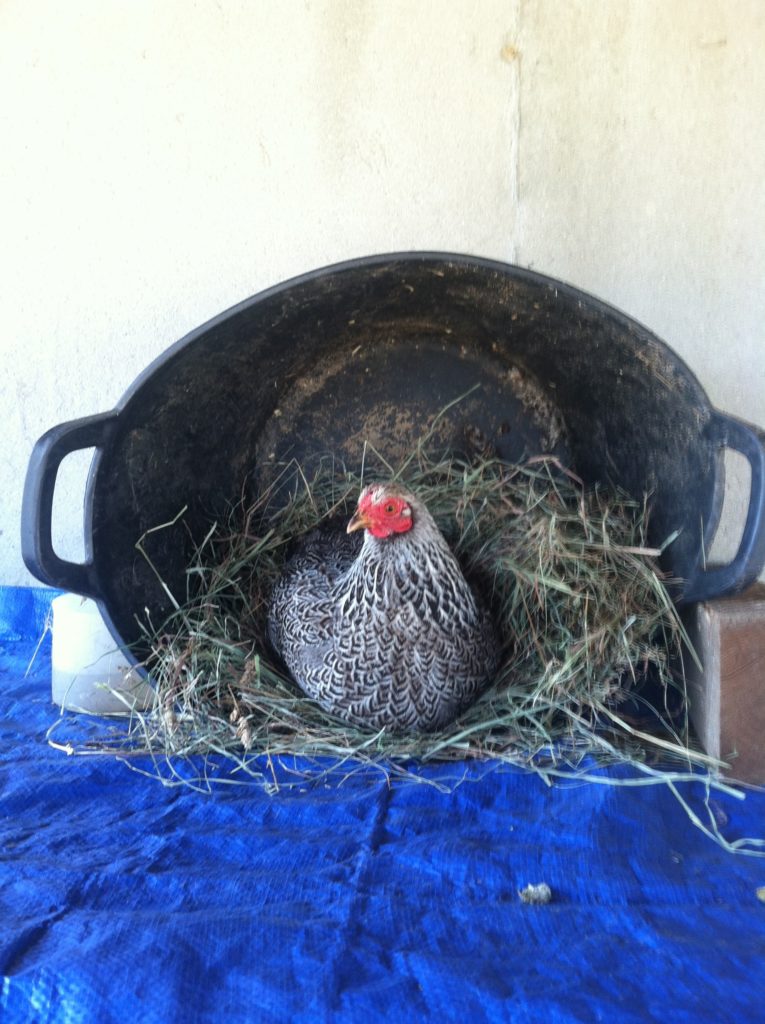
Carnellia in her bucket laying box, atop the coop, below the deck our first winter at Sweet Birch.

I am one of those lucky individuals whose father hoards construction materials. Wood, saws, measures, hardware…you name it, my father has it laying around his garage or basement. With a quick trip to his house, I had almost everything I needed to get my project off the ground! I started by framing the coop using the pre-existing deck posts as beams. I didn’t do any ground framework but rather set the vertical pressure treated planks a few inches in the ground then screwed them in up top. I measured and allotted for a standard sized door and left this gap between the foundation wall and the windbreak. I added an extra three inches to this measurement to account for water expansion and the 2×4 that would allow me to attach the door to the concrete.

framing. such potential! 

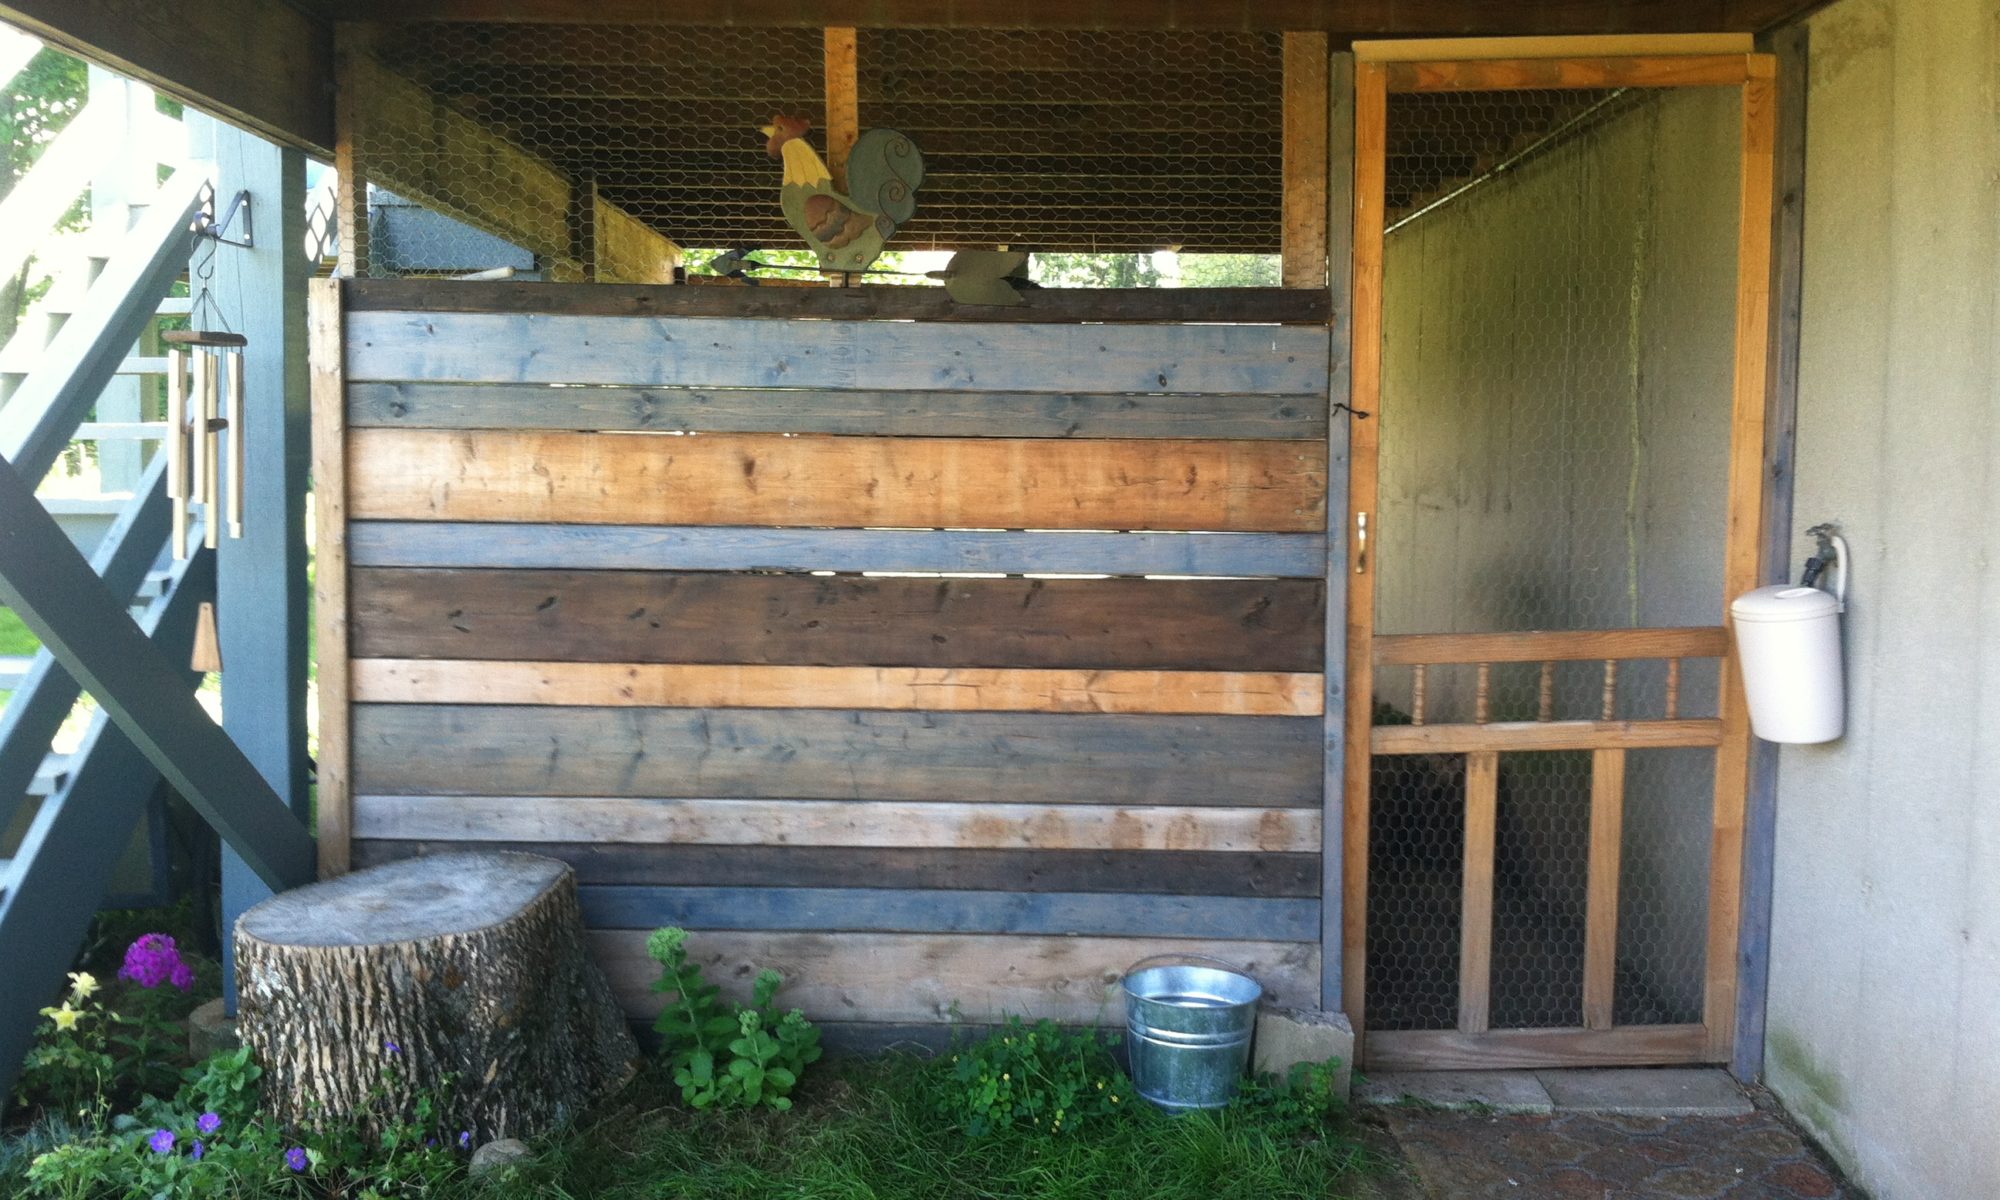
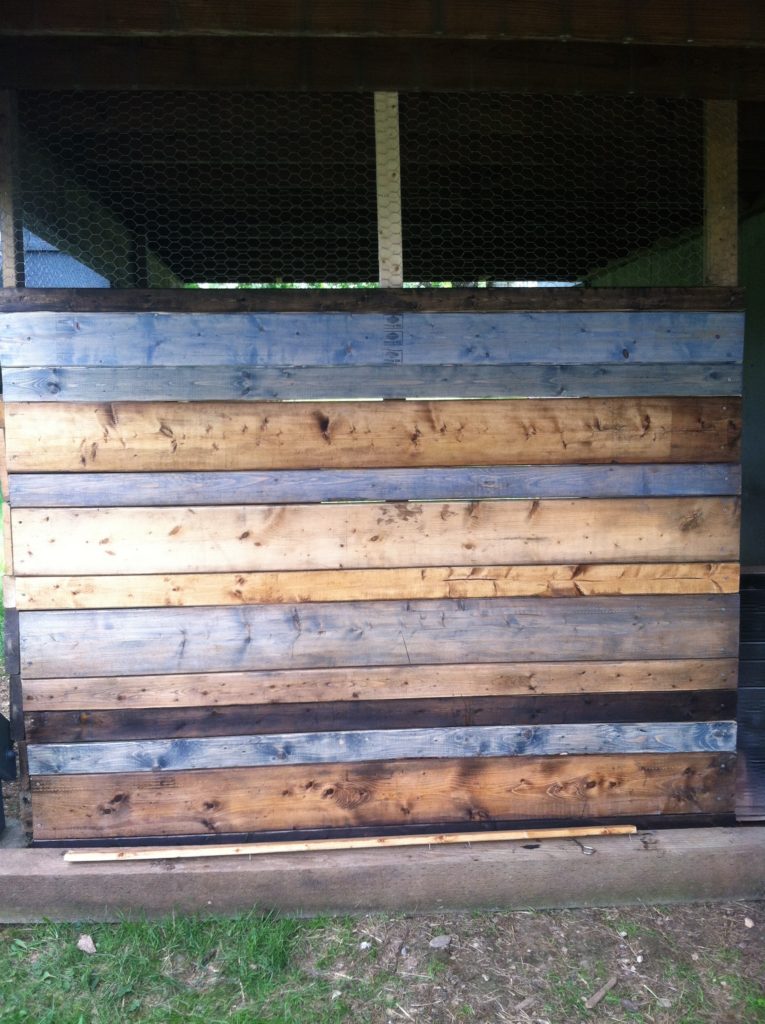
I chose to create a windbreak wall on the northeast sides of the run by lining planks up atop one another and then tucking the coop into that corner. I had already decided to stain the north facing side various shades of natural hues but discovered tinted stains and had to have those too! I purchased two sample size containers of blue hues and went to town. I was more than pleased with the results after a double coat of stain.

the wind block on the north side.
first coat of staining complete!

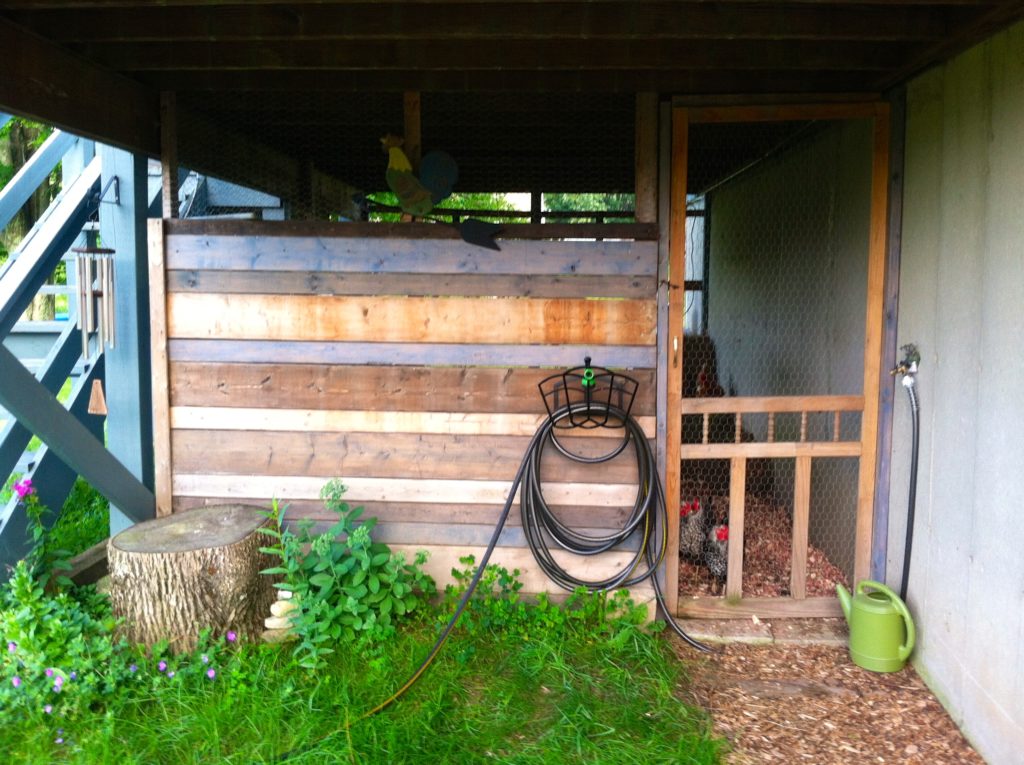
After researching DIY doors and recognizing that I neither owned, nor cared to own, a Kreg drill, I opted to buy a pre-made screen door from the local box shop. I found one with a big old chunk missing from the front and asked for a discount which was granted at check-out. Me and the 50% off cosmetically-damaged screen door returned to Sweet Birch for a quick installation.

I staple gunned chicken wire from the ground to the ceiling all the way around the coop and suddenly, with one last ca-chink of the gun, the hens were confined! I added a straw bale and a chicken swing, some perches and stumps, and that was that. The grass underfoot was quickly consumed and dirt hollows appeared in corners where the chickens bathed in the late morning sun on the eastern side. A platform to prevent rain from dripping into their food bowls was quickly adopted as a perch to see over the windbreak wall and the hens appeared content in their now permanent location.

the open air flow design for the south side.

I have had the run for a year and a half now and it has required minimal maintenance. The screen door’s flimsy screen material was swapped out for chicken wire and has been great ever since. Every once in awhile an icicle slips between the deck planks and the door and requires some effort, but ultimately I have zero complains about this set up!

incognito!

I comfortably house 5 hens in my under the deck chicken run with plans on expanding this spring as I bring on some new birds. My idea is that I’ll use the preexisting run and coop for my younger birds and then transition them to a larger outdoor area once they’re laying. Then, come winter, bring the whole flock (I anticipate no more than a baker’s dozen) back to the deck run for ease! I’ll keep you posted with new additions. This was a fun project that I would recommend to anyone comfortable with a circular saw and drill!

Happy hens; happy human and can you say ADORABLE!? I rolled a giant ash tree trunk to the corner for a little seat then planted some perennials that first year. This past summer I installed the hose hanger. I’d say this project is complete.

On Turning Thirty (3 year’s ago)

my mother is a mastermind, no?

As a true millennial I am a firm disbeliever in the theory of both growing up and getting old. I don’t like it, I don’t want it, and I’m just going to keep on resisting it… and I have, successfully, I might add, until my dirty thirty arrived.

The big 3-0.

The night before that pinnacle date, when I was still a bright-eyed and wily 29-year-old, I cried big, sloppy tears of “how has it come to this?” Thirty. Thirty?

Thirty means having your shit together and I was still struggling to remove skinny jeans without taking out the bureau or breaking a limb…while sober.

The way I have come to see it is this: For the entirety of your life before thirty, your body is essentially a ball of fleshy putty. You can beat it up, let it go to waste, treat it like a goddess, treat it like a trash receptacle, and miraculously, every morning, you wake up and that body is ready for whatever you throw at it next.

Run a 5K for fun, without training in advance? Don’t worry. Your twenty-something body will be repaired within 24-hours with little to remind you of the effort exerted the day prior.

Rip shots of Jager after downing three cranberry vods. in the same amount of minutes? It’s all good! Next morning, you’re ready for a lively brunch with friends who just hours before were weaving like sailors on a restless sea, arm in arm like a wasted centipede, trolling Main Street. Ahoy, hangover? Not for we, matey!

Sleep? Who needs sleep!? Sleep when you’re dead we’d say, double fisting a low-fat peppermint latte and a fifth of vanilla vodka (taste’s like Christmas!).

It took approximately 8-hours of exercise to develop a six-pack in your twenties, 3-weeks to destroy it from neglect, and then 4-hours to bring it back…we.were.# invincible. 

It’s not until you turn thirty that things start to gather a little dust, a little rust and then BAM, you find yourself knocked on your ass. To clarify, it’s not all bad. It’s just that a lot of not-so-awesome new developments coincide with that first year of our third decade. I’m not even going to touch on the psychological effects of grappling with thirty. There aren’t enough vacant slots at my therapist’s office for me to dig into that glass-laden sandbox. As for the physical indicators, well that welcome committee is composed of a bunch of friggen gremlins.

Those tricky bitches slink in when you’re balanced on the cusp of twenty and thirty. They amble their way into your bedroom in the wee hours before dawn while you lay dreaming of a promising future and forever perky breasts. Then they weave their freakishly flexible bodies up and onto your bed and there their fun begins! Oh the fun!

They toy with your rotator cuffs, plug up the tear glands in your formerly well-lubricated eyes, sprinkle some psoriasis onto your slumbering carcass and then punt you in the right kidney on the way out.

Jerked from your previously uninterrupted for the past 29-years, 8-hour sleep cycle, you are shocked to realize that the mere act of sitting up elicits a bolt of pain, everywhere <– emphasize ev-er-y syllable like the kid in the Sandlot voicing “forever.” perfect, thanks. Worse still, the inevitable sneeze that proceeds this incident (remember, those gremlins were tossing around autoimmune disorders like confetti) leads to a tweaked spine and now you’re stumbling around holding your C1-C7 with one hand and L1-L5 with the other, aggressively blinking sandpaper eyes while yelling “Alexa, how do you know if your back is thrown out?”

When I turned thirty in January of 2016, I was diagnosed with rosacea that same month, learned way more than I ever wanted to about the iliotibial band and what happens when that MF becomes inflamed,  and blew out my back twice. Additionally, I developed a pretty serious allergy to stinging assholes (read: wasps) and by “serious,” I mean I religiously carry an epiPen from April through November when the little bastards are out and about doing whatever useless-to-the-world activity they participate in during those warm seasonal days. On reflection, I can’t complain that my 30th year wasn’t eventful…swelling up like a tick with hives from face to feet and dragging a bum leg out of the Pemigewasset wilderness certainly isn’t boring. 

My best friend’s 30th was equally as action packed. Within the first few months of her 30th year she developed an unidentified rash on her hands that cleared up just in time for contact dermatitis to assault her beautiful green eyes. After a broken tailbone and a cracked pelvis (from two separate incidents!), an additional bout of contact dermatitis, a rosacea diagnosis (twins!) and the most bizarre case of eczema imaginable, my poor, sweet friend got the cherry on top with the gift of symptomatic lactose intolerance. Happy 30th Birthday Beth! Hold the ice-cream, girl. 

celebrating my thirtieth with a good friend (not Beth) and a good glass of wine. see how pink my nose is? that’s an early indicator of rosacea as I learned in the following weeks. fanfuckingtastic.

Turning thirty makes you tougher. It makes you appreciate your body…especially when it’s working. So take this time, whether you are right in the midst of your thirties, approaching your thirties (you’re time will come!), or well beyond the fortuitous early stages of that particular life decade, and give thanks to your body. Perhaps stick to an upper or a downer beverage rather than juggling both and stretch before sitting up in bed. And never let your guard down in regards to a sneeze. Those things can sneak up like a heart attack and, as I’ve learned from experience, can wreak a surprisingly similar amount of havoc.

Happy 30th Birthday, mortal!

Hope you enjoy the age-appropriate gifts.

Threw some curveballs in there this time!

Love,

the Universe

 PS- learn to take off your pants like an adult this year.

Cheers to 30! Now I simply refuse to turn 40.

Autumn Reflections

I grew up in a modest home in a modest neighborhood in southern New Hampshire. We had tons of kids on the block and our street not only ended with a cul-de-sac, but also had a basketball hoop to boot. Read:idyllic childhood setting. We were known as the people with the animals on Terra Lane. And oh, did we have animals.

Perhaps it was because my mother, having been raised with non-pet friendly parents in a suburban New York neighborhood, felt the need to compensate. Perhaps it was because my father wanted my sister and I to want for nothing when it came to animal companions. Perhaps it was because we were all crazy. Whatever the reason, I grew up in a household where there were cats,dogs, rodents, birds and reptiles in abundance within the house and goats,ponies, poultry, sheep, llamas and swine in the backyard. I should note that we lived on an acre; as you can imagine, it was a bit busy at 13 Terra Lane.

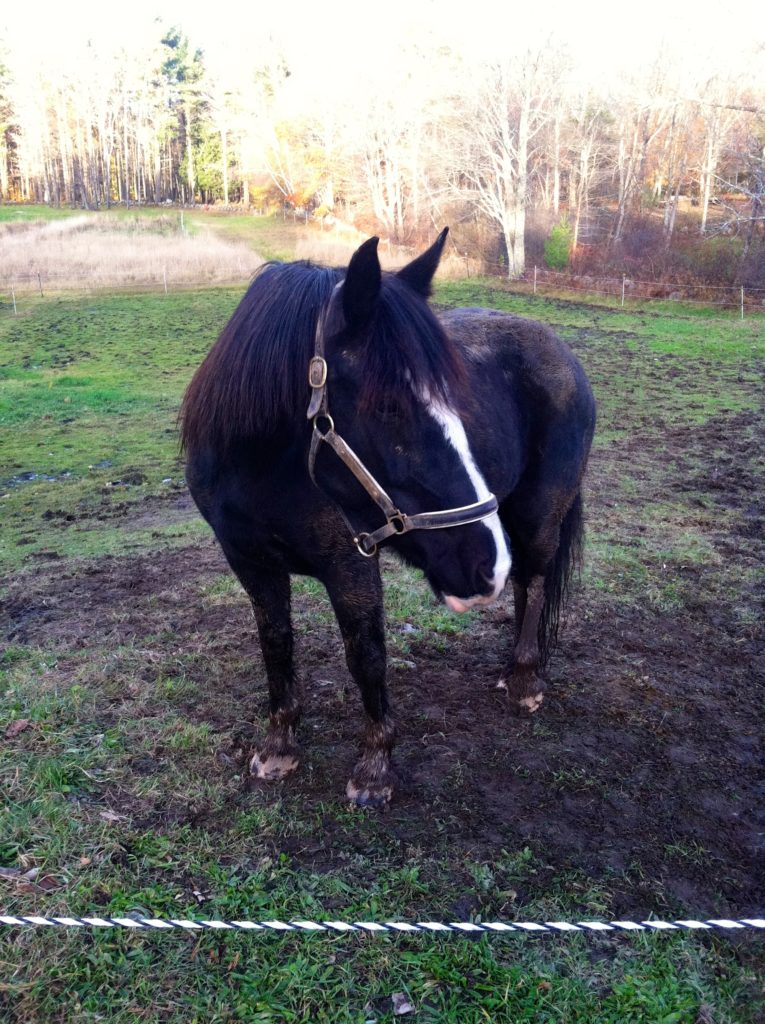
Fast-forward two decades and here I am on my own small hobby farm; same state, different town. While I have significantly decreased the amount of creatures I care for, my roots remain in part true to my upbringing. I have hens, a ball python and one horse, and I’m considering a small flock of hardy sheep and perhaps a pair of peafowl in the near future. My land parcel is modest for the area, but more than enough for my interests. Sitting on just a bit more than seven acres, Sweet Birch Homestead is a growing hobby that just might turn into a part-time career.

I live in a cape with a huge unfinished basement (to my annoyance and dragging of the feet), an open concept main level, and a sunny upstairs that I rent. Without my renter I would struggle to finance this house and I plan on keeping a renter for as long as I live in this location. The land is not ideal but it sure is lovely to look at. Composed of hills and slopes and acting as a basin for the neighborhood it is a bog for the majority of the year until it freezes. I bought the property during a drought and while the seller was upfront about it being “wet” I never could have imagined just how wet it could be until this past year when New Hampshire broke historic rainfall records. To say the pastures are damp would be like saying the Dead Sea is a tad salty…

For now, the paddock is covered in several inches of snow, hiding the muddy sludge that was my glossy, green meadow back in June. Spring will be a struggle, for sure, but with hope, it will be a struggle that inspires improved drainage for the future of the homestead. Now I just have to figure out how to get an excavator down there without losing it to the bog…

Stay tuned to see how I utilize permaculture concepts to divert the water and mitigate the seasonal sludge. I’ve got some ideas, but if you have experience with wet farmland, do feel free to share!

‘Tis the season for Fire Cider

Fire Cider: What, How & Why?

It’s getting brisk here in New Hampshire. The thermostat read nineteen-degrees this morning as I blasted a mallet through the frozen crust on Panda’s trough. Time to prep for constant cold. Insulate, layer, keep dry and stay warm: at Sweet Birch Homestead, this is my mantra and the things that can make or break my season.

Struggling through the winter makes it longer and harder to bear, whereas embracing the frigid season with full preparedness makes it not only more tolerable, but sometimes, genuinely enjoyable. That is until all the temperature fluxes and shared germs of the holidays arrive. In which case: fire cider to the rescue!


Last night I hosted my first class of Autumn here at The Magpie’s Apprentice. We were learning about and then making, some homemade fire cider. Fire cider is a staple in my home. Just ask my friends; they can testify to that since I am forever making them taste new recipes of this delicious, albeit spicy, blend of herbs and vinegar.  I first began making this magical concoction four years ago when a grad school colleague turned me onto the pungent panacea.

I was in my fourth semester of graduate school when the onset of a sinus infection brought me to a groggy halt. My maxillary sinuses (those below the eyes) and frontal sinuses (above the eyes) felt so swollen it was as though my face had a pulse of its own. When menthol massages and eucalyptus steams did nothing to drain them, I was frustrated and downtrodden. I knew the next step was an OTC medication and the price (remember, grad school student here) and unpleasantness of pill-popping was not my preferred method of recovery. Preventing a full-blown sinus infection, however, was going to result in more severe approaches, not to mention the added cost of a copay for an actual diagnosis.

The Universe intervened when my colleague commented on my incessant forehead rubbing and inquired as to what was going on. Within minutes of discussing my symptoms, she not only recommended fire cider (what in the world is this magic?), but also invited me to make a fresh batch with her that week.  Let me tell you, best recommendation, ever! Since that life-altering recipe was shared, I have passed it on to numerous sinus sufferers. I should note here, that it’s not just sinus pressure that gets kicked to the curb with fire cider; it’s common colds and even the flu, too.

So what is fire cider and how does it work? Let me give you a brief description followed by the recipe I have adapted to better suit my needs. 

Fire cider is a tincture, for all intensive purposes, and a tincture as defined by the herbalist community. It takes marc (raw materials such as herbs and spices) and places it in a menstruum (the liquid solvent) where it is left to sit while the nutrients, vitamins, minerals and enzymes (essentially all the “stuff” that makes up a plant profile) are extracted by that same menstruum. Once the extended marc is removed from the menstruum through various straining methods, the remaining product is the tincture. Simple enough, right?

Fire cider is said to have developed back in the early 80’s in the kitchen of renowned herbalist, Rosemary Gladstar. The concoction combines reputable ingredients (from folklore and ancient records) with apple cider vinegar to create a fairly magical remedy geared towards improving digestion and boosting immunity. Here are the ingredients and the constituents for why it is they work: 

Gather your ingredients, kitchen witches!
  • Onions: onions are a super food! They are packed with B vitamins, C vitamins, folic acid and sulfites. Onions can improve digestion, promote healing and boost metabolism. Their anti-inflammatory properties combined with their role as an expectorant, makes them a powerhouse for both preventing and treating cold symptoms.
  • Hot Peppers: capsaicin is the heat in hot peppers. This spicy compound can aid digestion, improve circulation and reduce pain and inflammation, making it an excellent addition to our fire cider.
  • Citrus Fruits: besides being high in vitamin C, which supports a healthy immunity, citrus fruits like lemons and oranges also contain anti-microbial and astringent properties and add a burst of flavor to our cider mix.
  • Horseradish: if just grating horseradish can open up your sinuses, imagine what consuming this incredible root can do. This herb rushes to the sinus cavities and flushes out congestion. It also is a fantastic digestive aid and we should all know by now, that a healthy gut makes a healthy person!
  • Ginger: ginger promotes circulation, decreases nausea and is anti-inflammatory, thus relieving pain and swelling. It is a warming herb and aids in boosting immunity.
  • Garlic: garlic is also in the Allium family and thus shares similar traits to its larger cousin, the onion. This herb has been used for millennia for its antimicrobial and antibacterial properties. Taking garlic has been proven to drastically reduce cold symptoms and shorten the duration of said cold. 
  • Turmeric: known for its anti-inflammatory and antioxidant properties, turmeric is a great herb to promote health and wellness from the inside out.
  • Hibiscus: the calyces of the hibiscus plant (Hibiscus sabdariffa) are loaded with Vitamin C. We use hibiscus in this recipe for the tangy taste and the immunity boosting properties, plus, I just can’t say no to its gorgeous hue!
  • Apple cider vinegar: ACV is well known in the holistic health field. We use it in fire cider as the menstruum, that is, the liquid used to extract the nutritive and medicinal qualities of the marc (the raw materials in the tincture). ACV is palatable, astringent and locally available. Always choose the organic option when using ACV as a healing solvent.
  • Honey: honey’s restorative properties have been revered since the days of Ancient Egypt. Used externally to heal abrasions and prevent infection, honey is packed with healthy enzymes used to ward of unwanted bacterium internally as well. I don’t know about a spoonful of sugar, but a spoonful of honey may be all the medicine you need!

You can add additional herbs or reduce the heat by omitting some of the above ingredients but I highly encourage you to stick to these four, regardless: horseradish, ginger, onions and garlic. Those are Nature’s antibiotics! The following recipe was adapted by me and one that I use at my homestead. 

And now, we wait. Don’t you love that pretty pink hue? That’s in thanks to the hibiscus!

For a 32 oz. container

1 cup diced purple onion

2 jalapeno peppers, sliced.

1 lemon, sliced

1 orange, sliced

½ cup grated horseradish

¼ cup grated ginger root

4 cloves garlic, crushed or grated

2 tbsp. grated turmeric

½ tbsp. ground cayenne pepper

½ -1 tsp. dried hibiscus

Organic apple cider vinegar

3+ tbsp. reliably sourced honey

      Instructions:

  1. Prepare all ingredients by dicing, slicing, squeezing and grating. This is where the health benefits begin! You’ll feel the horseradish and onions opening up your sinuses immediately. A well-ventilated location is recommended.
  2. Place all ingredients excluding honey in clean container.
  3.  Cover completely with apple cider vinegar.
  4. Cover the concoction. If using a metal lid, place waxed paper between the lid and jar to prevent corrosion from the vinegar.
  5. Let sit for 4-6 weeks. I know waiting is the worst, but it’s worth it!
  6. Strain your fire cider. The remaining liquid is your soon-to-be final product.
  7. Add honey.
  8. Walla! You are done! Return your fire cider to its original container after a quick rinse or divvy it up into smaller containers. Use the pickled herbs and veggies mix on top of salads or as a stir-fry or dispose of as you wish!

Your fire cider will have a long and healthy shelf life as long as all the raw materials have been removed. Take a shot daily during cold and flu season or dilute in water or juice and enjoy!

Tilling by Hand: Insanely empowering or just plain insane?

I decided this year that my current garden plot was too small for the amount of herbs and vegetables I want to try my hand at. The first year I was here I constructed and utilized two small raised beds. The next year, after acquiring some free lumber from a neighbor in town, I added a larger vegetable bed and two new narrow herb beds. This year I decided to go big. I sketched out a plot and instead of planning with lumber, I opted for the directly into the earth concept! Novel? Not at all…but new to me.

Lesson one: preparing a site for an in-ground garden is WAY more work than preparing a site for a raised bed!

Lesson two: if you don’t own a rototiller…find a friend (heck, make a new friend) that has access to one!

Lesson three: if you can handle the labor, the end result is pretty darn impressive. And empowering!

So here’s my super quick how-to prep a garden site without machinery guide!

Step One: Pick your location.  Plants like sun. They also like drainage. Be sure to pick a flat location in your yard that offers both of these. Drainage you can amend but finding a sunny location (I’m talking, no less than 6 hours of direct sunlight) is imperative for most herbs and vegetables.

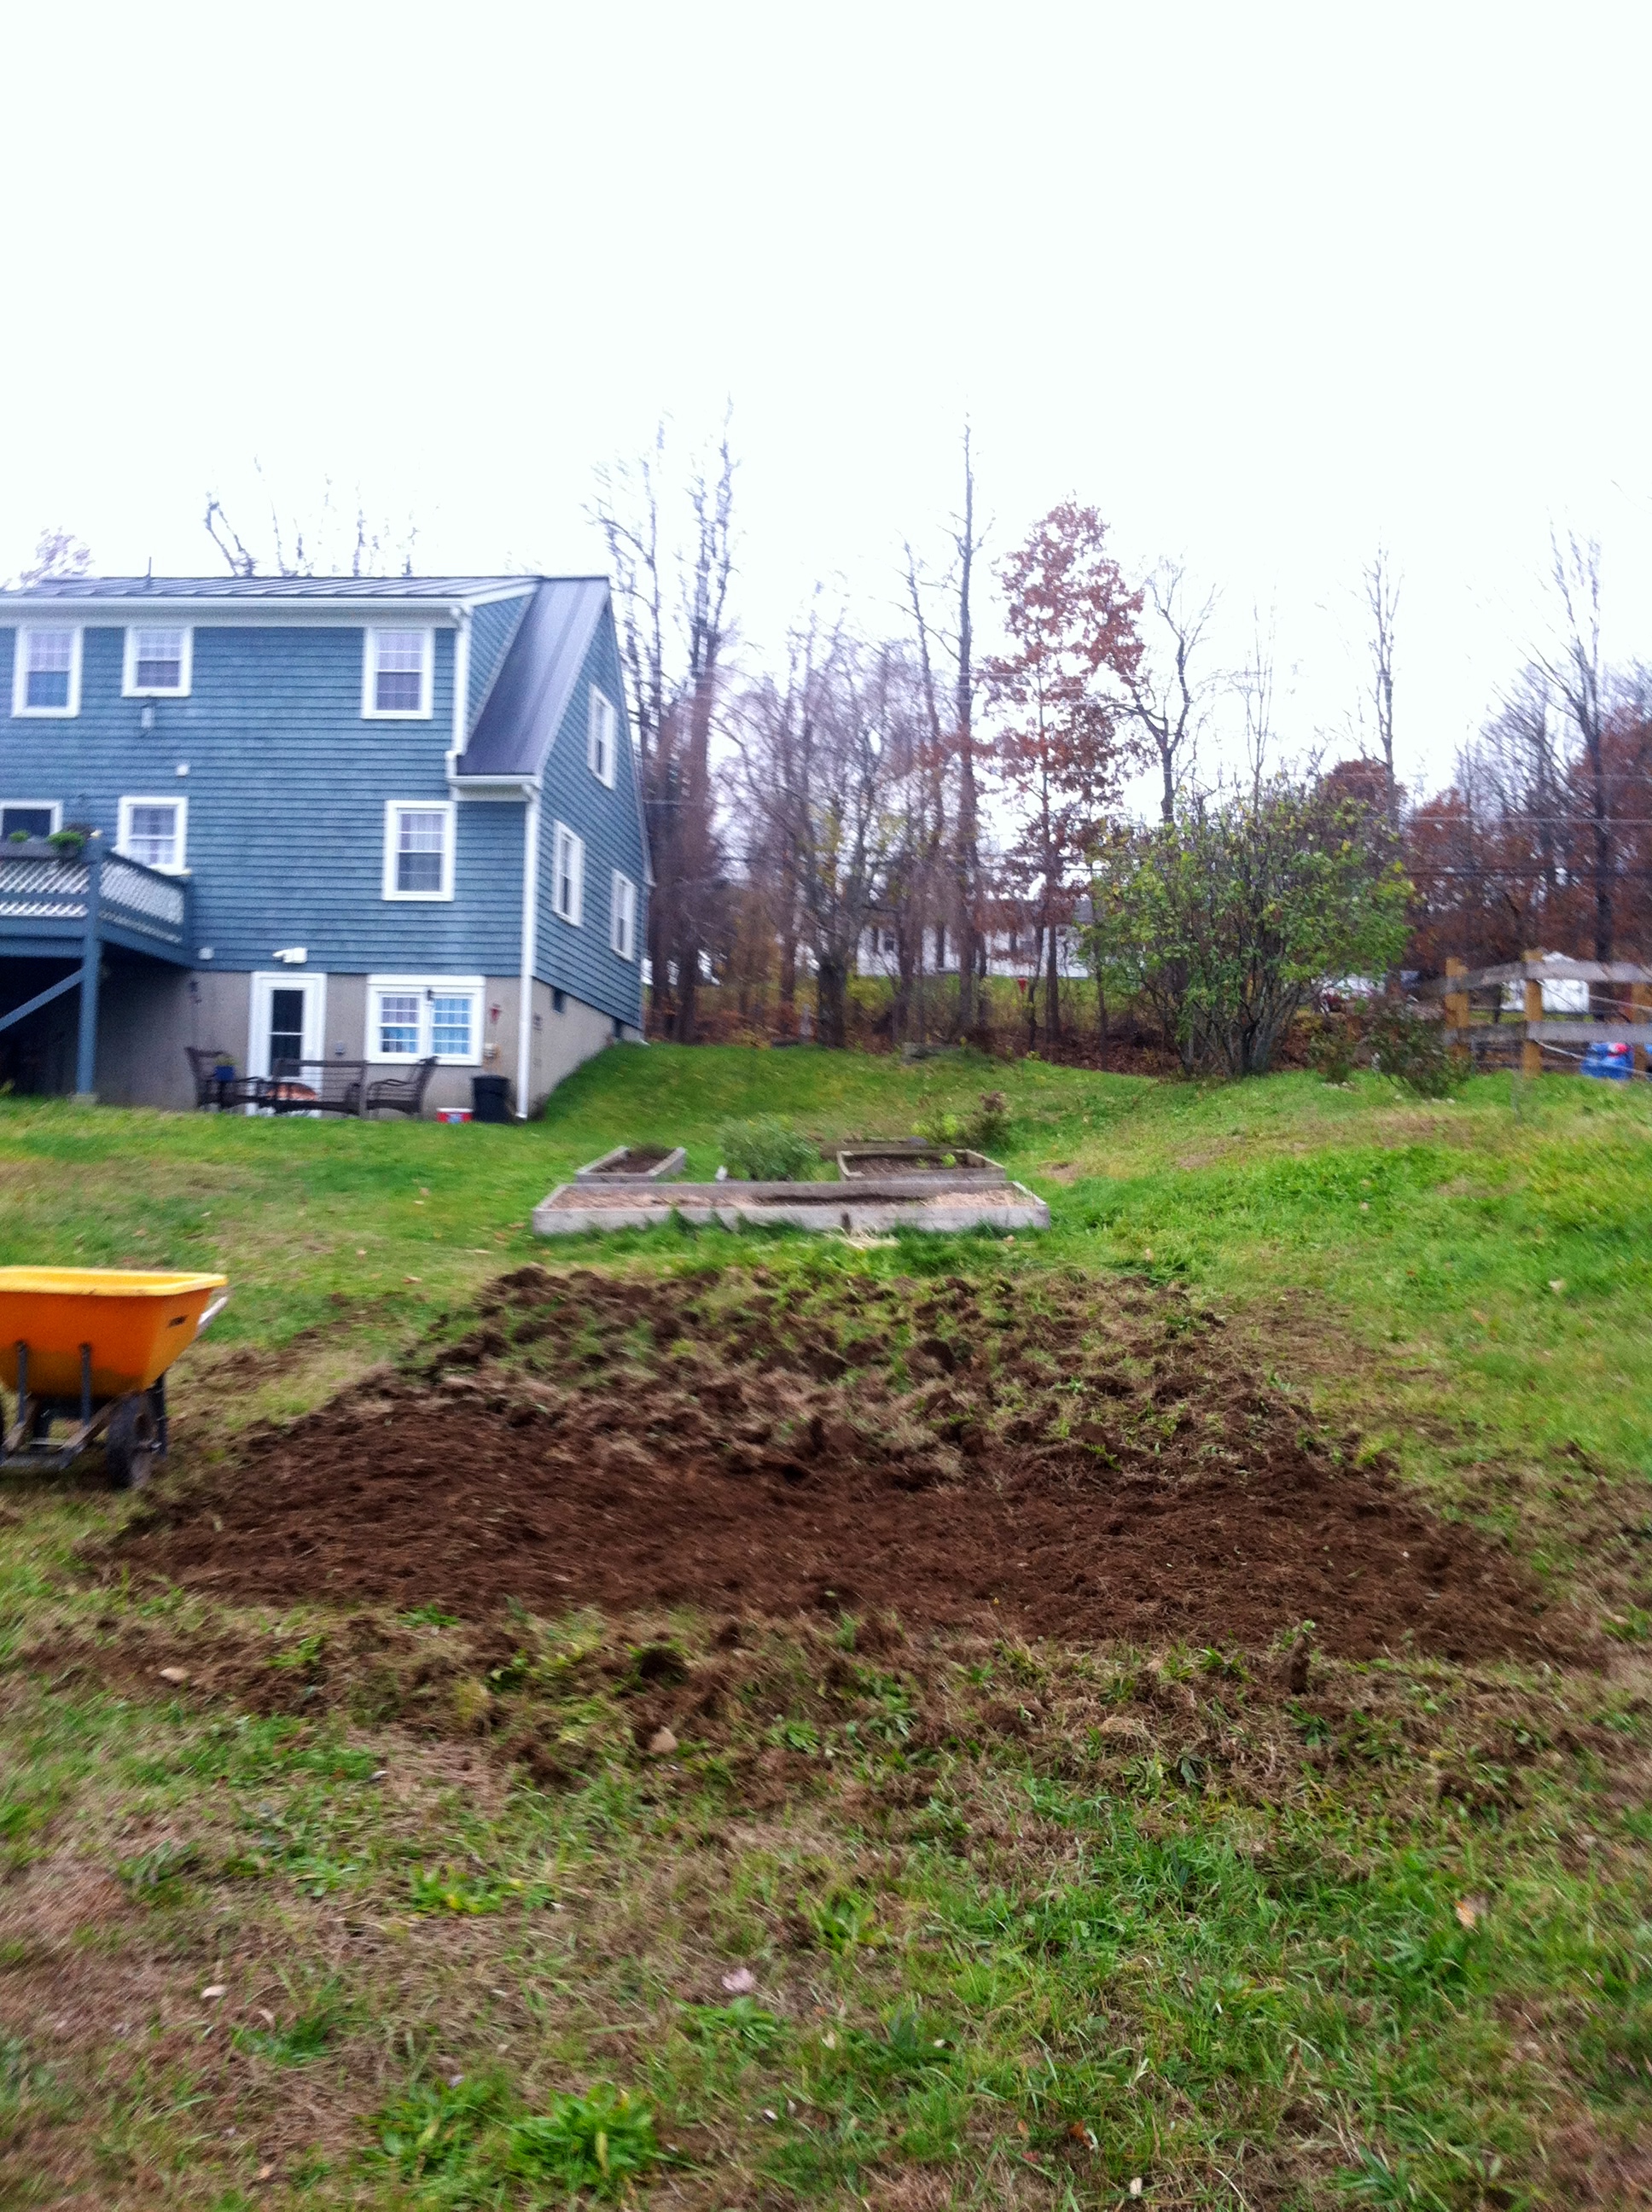
You can’t see it here but my pre-existing beds are just to the left of this caption. I can reach this site with my hose and sprinkler system, it gets 12 hours of sunlight in the summer months, and it’s just begging to be a veggie bed! 

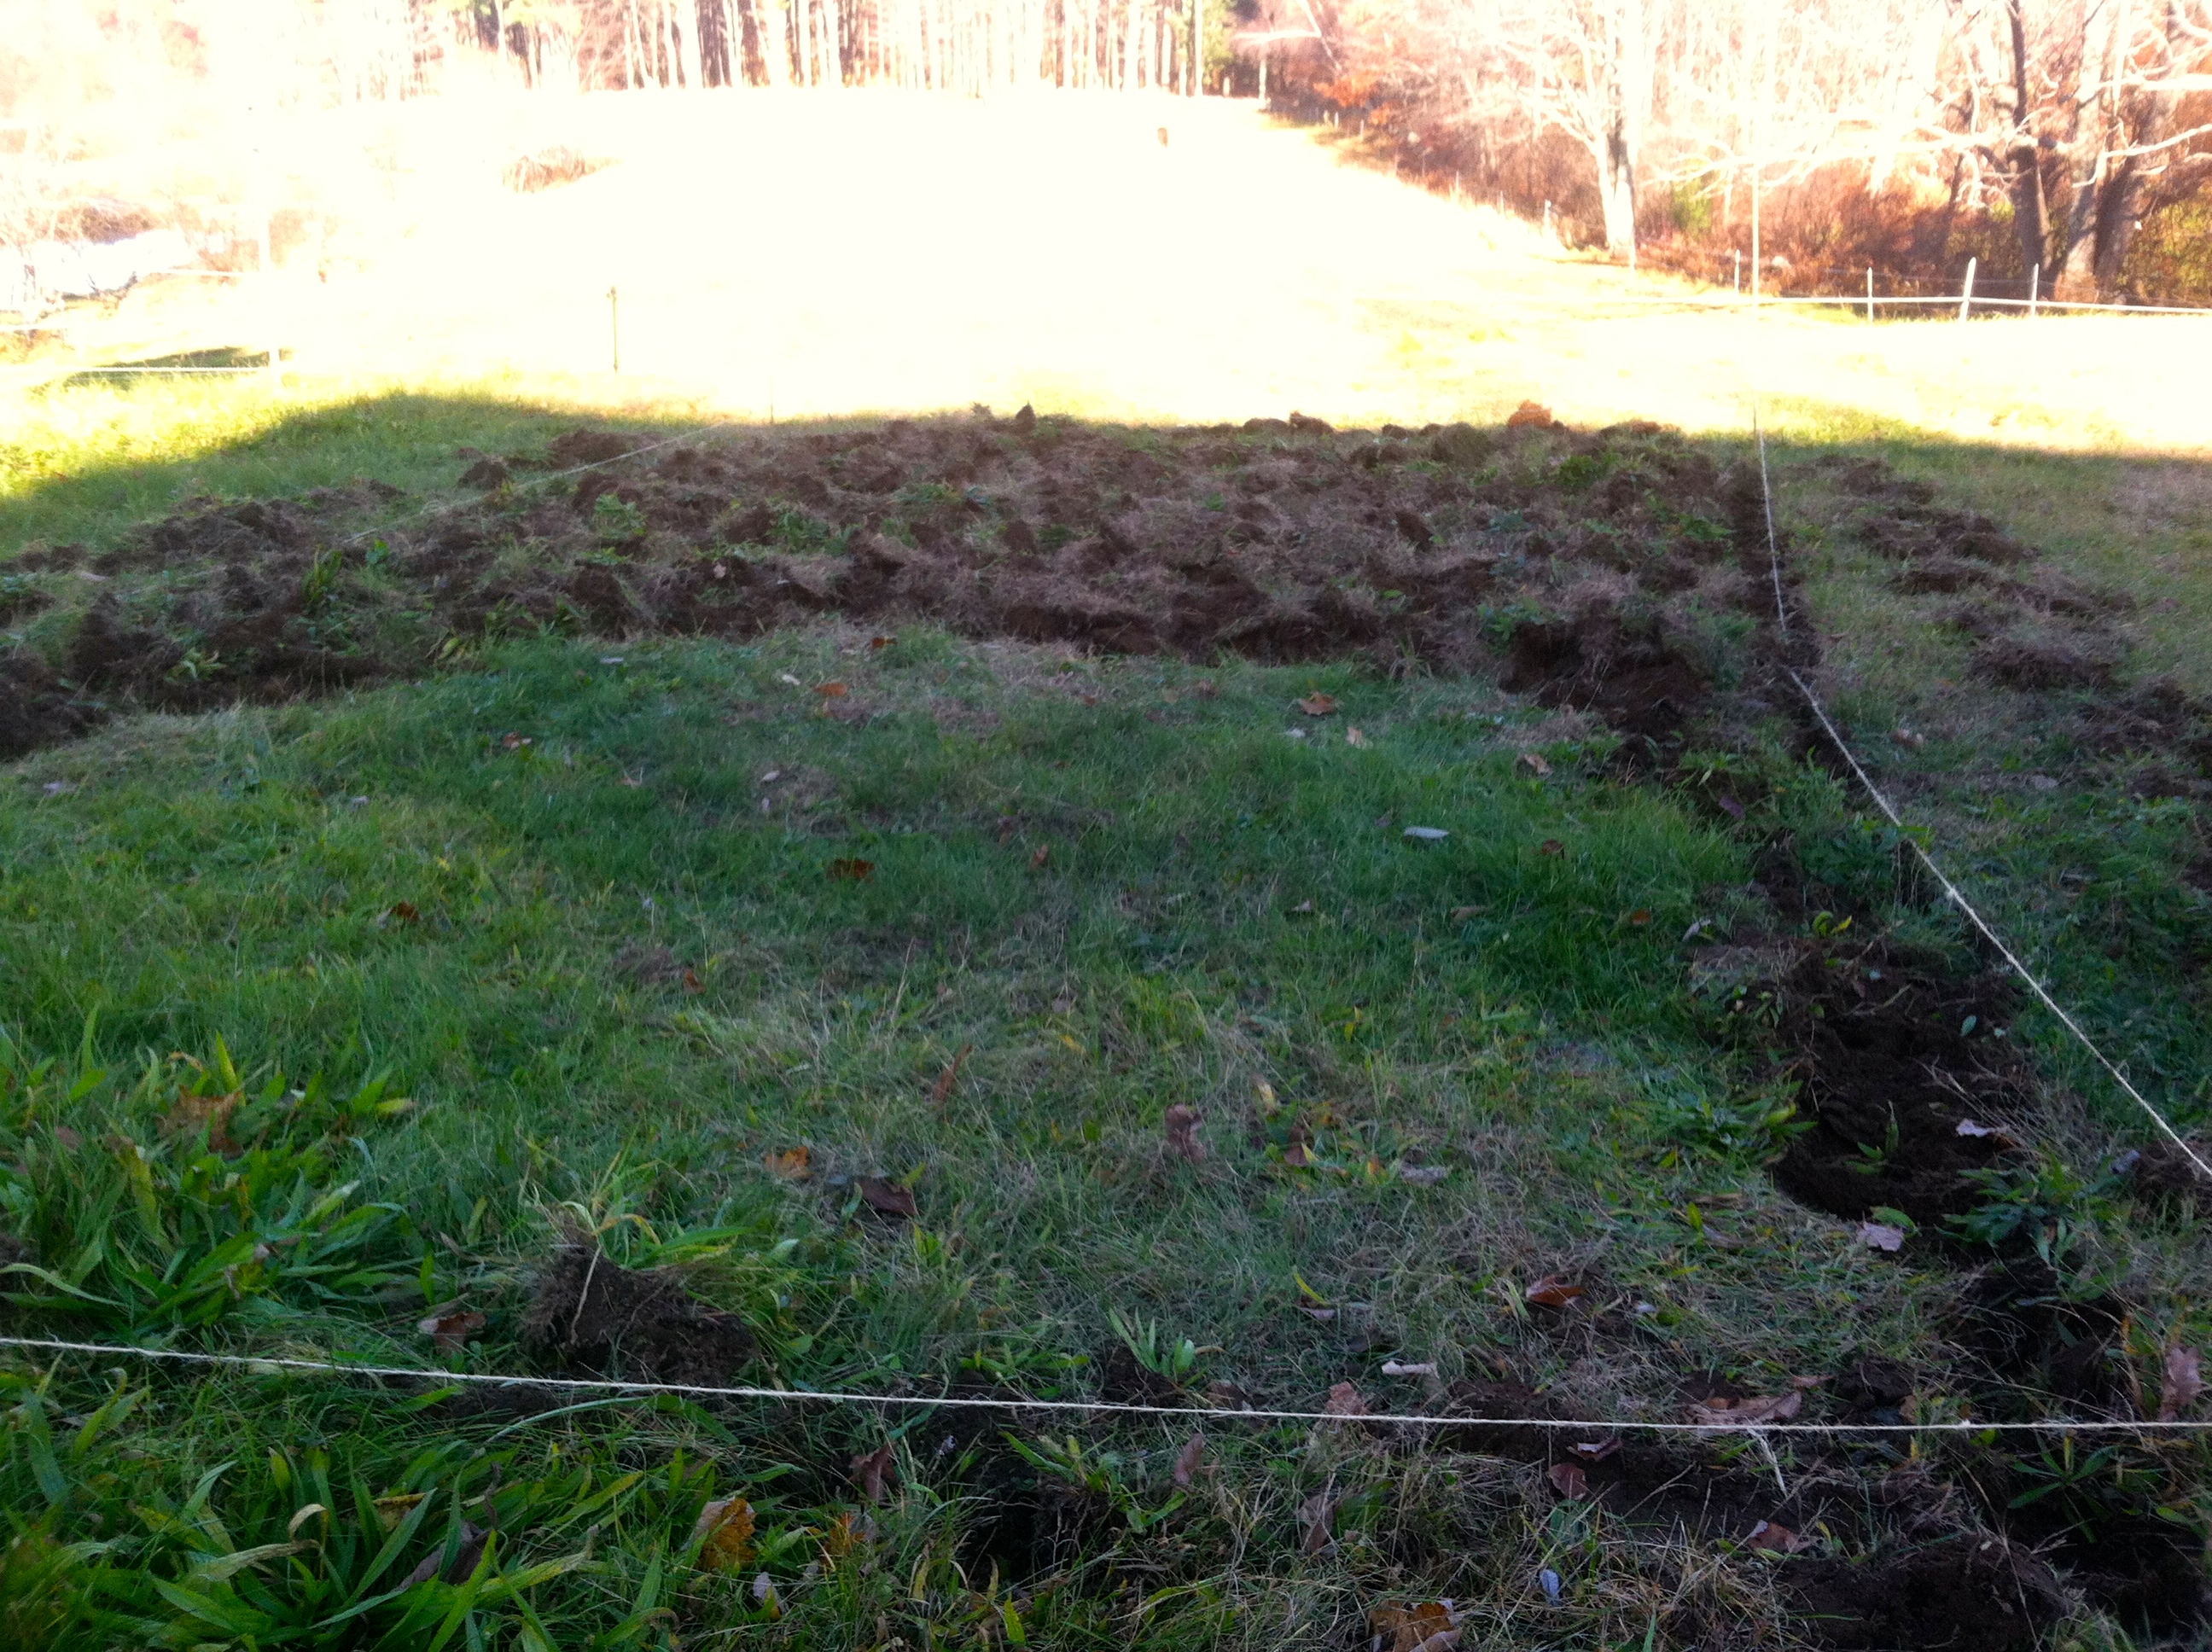
Step Two: Outline your perspective bed. I used tomato stakes and some old chord and played around with location and dimensions. Keep in mind how much you’re planning on growing. Less is sometimes more. Make sure you are able to get water to this location. Hauling water is less than ideal and if your plot isn’t easily accessible, you’re not going to be as eager to visit it.

Step Three: Dig in, literally! Start spading around the perimeter following your outline. Push and flip, and really make sure you’re getting the roots out. The harder you work now, the less work you’ll have come Spring! The end result will look like a mole upheaved a very particular portion of your lawn and your back will probably be letting you know that you invested some energy into that plot. Bend at the waist and let gravity feed your shovel. Oh. And wear boots that have a hard sole as arch bruises are slow to heal and fairly preventable!

Slow and steady wins the race. 

Step Four: Remove all that turf! It’s going to be heavy and it’s going to be labor intense. Take your time. This isn’t a race! I used a wheelbarrow and shook out as much dirt as I could so that each load wasn’t overly heavy. This turf will make for good compost in the future if you have a site to dump it. Otherwise, kick it to the edge of your yard and allow nature to break it down.

So.much.sod. This part was truly exhausting but also provided time for me to sort my thoughts. Dual productivity. Gardening can be so therapeutic. 

Step Five: When you’re done removing all that grassy sod (and wondering why on Earth you thought doing this without the aid of a machine was a good idea) it’s time to get your soil tested. All soil can be amended. Contact your local Extension office and get a sample in the mail. While waiting for your results, collect wood ash, fallen leaves, and any manures you have access to (chicken, cow and seasoned horse manure are great options if locally available). These can be used as your compost materials in addition to any purchased soils you may need for a successful foundation.

Step Six: Till that plot and cover it up. Unless you are planting a cover crop in your newly amended garden bed, cover it. Cover it with chipped leaves, with straw, with an old rug or tarp…cover it so that you don’t end up harvesting weeds come early Spring.

Step Seven: You’re done! You have just schemed, dreamed and created a future plot! Now that it has been put to bed for the coming winter, get out your notebook and start planning what you’re going to plant and where you’re going to put it in your new, handmade, in-ground garden. You are a warrior! Well done! Happy growing!

Sunkissed

Woke to sun on Sunday! And what an uplifting event that was. For those of you in the New England area, and New Hampshire specifically, you know what I am talking about.

It has been a dreary Autumn to say the least. Week upon week of rain, rain, rain. And to make matters worse, the sun would actually part through the clouds just as it was slipping behind the horizon at dusk, the fiery tease. It has been trying, to say the least.

Never did I think that I would become a person that spoke of the weather. That topic is reserved for…come closer so I can whisper it from shielded lips…that topic is reserved for old people! And readers, I am not old; not even close.

I am a millennial. We don’t age. Didn’t know that did you? We are abhorrently against aging; we resent the mere notion of it. Retirement? Not for us. We love what we do, so work isn’t work. Senior discounts? Meh. We’ve figured out how to use the public library, mobile apps and even our old student ID’s (don’t judge) to our advantage. AARP need not inquire. I say this all in jest but then, simultaneously I do wonder about ageism and my [skewed] viewpoint on it…More on that fun topic later, but for now: the sunlight!

Spent the day traversing Cotton Mountain before ascending Livermore in an attempt to soak up some D. ‘Mountain’ is a generous term for both of these lovely little hills in the Lakes Region. My trail gal Maria met me for this particular jaunt that begins in Holderness, NH.

The trail was littered with a truly delightful array of variably hued leaves right from the get go: scarlet sugar maples, amber aspens, copper beeches and rusty oaks crinkled beneath our boots and added a melody to our journey.

Every hike, no matter how short or long, challenging or relaxing, is a journey in my book. The beauty of a walk in the woods is the absolute fact that no matter how many times you repeat it, it is never the same as the time before. I love that. There will be another leaf on the ground perhaps, a new caterpillar crossing, a different angle of sun through the trees, a new perspective from you. 

It’s no surprise that doctors are actually prescribing nature walks to their taut and wired patients. It really is a joy and truly does offer solace from those lists we like to make. You know the ones. They’re like seventeen lines long and range from “wake up” (‘cause sometimes you just need an immediate success to get you going) to “work out. for real” and “come up with scientifically backed resolutions to temporarily stall the climate change sitch.”

Our lists are vast and varied and while they are meant to organize priorities, sometimes they just create stress. “Shoot,” I would mutter if I hadn’t been reared on a ship as a powder monkey with a swashbuckler father, “I accomplished nothing today.” Switch ‘shoot’ to something more akin to a pirate’s patois and you’d have my actual declaration. On days like these I plan a weekend in the woods. So far, they’ve never disappointed.

If you, like me, are ever feeling a bit overwhelmed by the lists, the must-do’s the should do’s the how will I ever’s…hit the trails. Get out there and play in the woods. Build a faerie fort, heck, build a life-sized fort. Prance in the puddles, collect some fallen leaves, go on a stone hunt and find that perfect pebble. Don’t have access to the forest? Get to a park, visit a botanical garden or nature center. Find a tree and introduce yourself. Connecting with nature is connecting with your inner self. Get dirty! Get outside. You’ll be surprised how much easier breathing can be after you’re forced to suck wind because you’re exhilarated.

Every once in a while our heart and lungs need to be reset by the effects of natural joy. Instagram and Candycrush won’t cut it. So ditch the synthetic crap for a moment and toss your list to the winds! I mean, don’t really throw your list to the winds. That’s littering and that type of poor behavior can land you with a legitimate AF fine. Ever hear the phrase “Happy as a pig in mud?” Live by that from time to time. You never know… that next ah-ha moment could come while making a muck castle by a riverbed or a dream job outline along the banks of a puddle.

Unfortunately the sun has since gone away. We got one blessed day of rays before they were stolen back by the clouds of November. The snapshot reminiscence of scattered, layered leaves and the feel of sunkiss on ruddy cheeks is remembered though; and with hope, those memories alone are enough to keep me going until the next sunshiney day. Until then, the foliage pops against that ashy backdrop and beauty can still be found as long as you’re willing to see it.

Hello world!

I find it fitting that my first post falls on All Hallows Eve. The day when the veil between the living and the dead is at its thinnest. A day when those of us raised in the 90s are binging on Hocus Pocus and Harry Potter while pledging to go sugar-free starting tomorrow, November 1st. I’m not judging! I just popped a chunk of Peruvian chocolate into my mouth while eyeballing my copy of “Order of the Phoenix” with an invitational brow raise.

All Hallow’s Eve or Halloween or Samhain depending on your preference is one of those holidays that New England just does RIGHT. From the step-back-in-time magic of a day spent meandering the cobbled streets of Salem, Mass. to the epic jack-o-lantern display at Keene, NH’s PumpkinFest, New Englanders lay it on thick for our favorite October holiday. Between the spiked apple cider and the haunted walks, and everything in between Halloween in New England is where.it’s.at.