Under the Deck Chicken Coop
I closed on my first house the week of Halloween a couple months before I turned thirty. I had with me all my worldly possessions: hand me down furniture, a beat up mattress from college and bins of photos from my prior travels. I also had with me a trio of gerbils and a small flock of hens. The feathered farts were delighted to find out I had yet to put up a run before their arrival and as such, exploited their freedom and were complete and total turds.

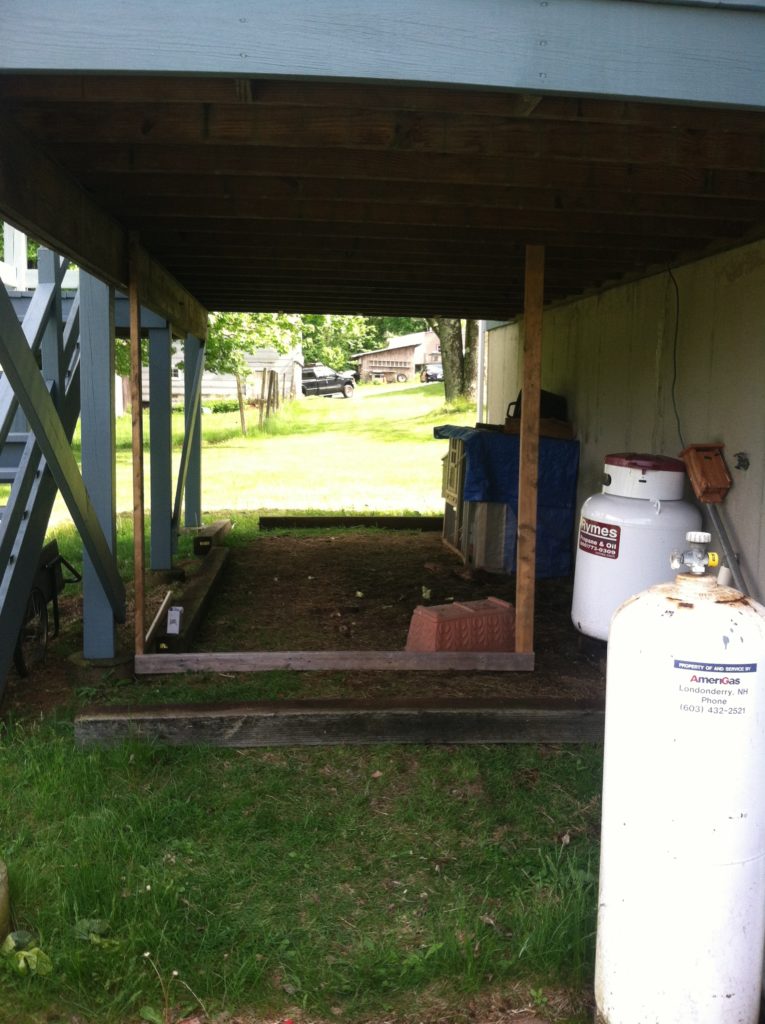
It was blatantly obvious that my girls would not survive long in the open meadows of the new place but I didn’t have the means to put up a standard framed coop, nor did I know where I’d like to position them on the property. So, I did what any crazy chicken person would do…I set my hens up under the back deck.
Their old coop was relocated so that it was flush against the foundation and with some ingenuity (read: baling twine and toddler fencing), the hens were contained (I use the word ‘contained’ loosely here) and protected from overhead predators until I could reassess in the spring.
Having them so close that first winter was fantastic. At my last place I had to firstly shovel a path just to get to the coop before then shoveling out the coop in order to operate the doors. After this I would clear an area around their small fortress otherwise they’d stay in all day, vocalizing their disdain for the horrible white stuff on the ground outside, and make an awful mess.
Here, the 200-square-foot deck ‘ceiling’ caught the majority of the snow, leaving a dry pen underneath. The snow that fell around the deck created a natural fence line for my tender-footed, nomadic flock and I never played hide ‘n’ seek hen again that winter. As an added bonus, the basement door is approximately six feet from the deck overhang so there was no need to bother with shoveling a path to and from the coop. The hens were happy, I was happy, and by the time spring arrived I had decided to build a permanent run under the deck.
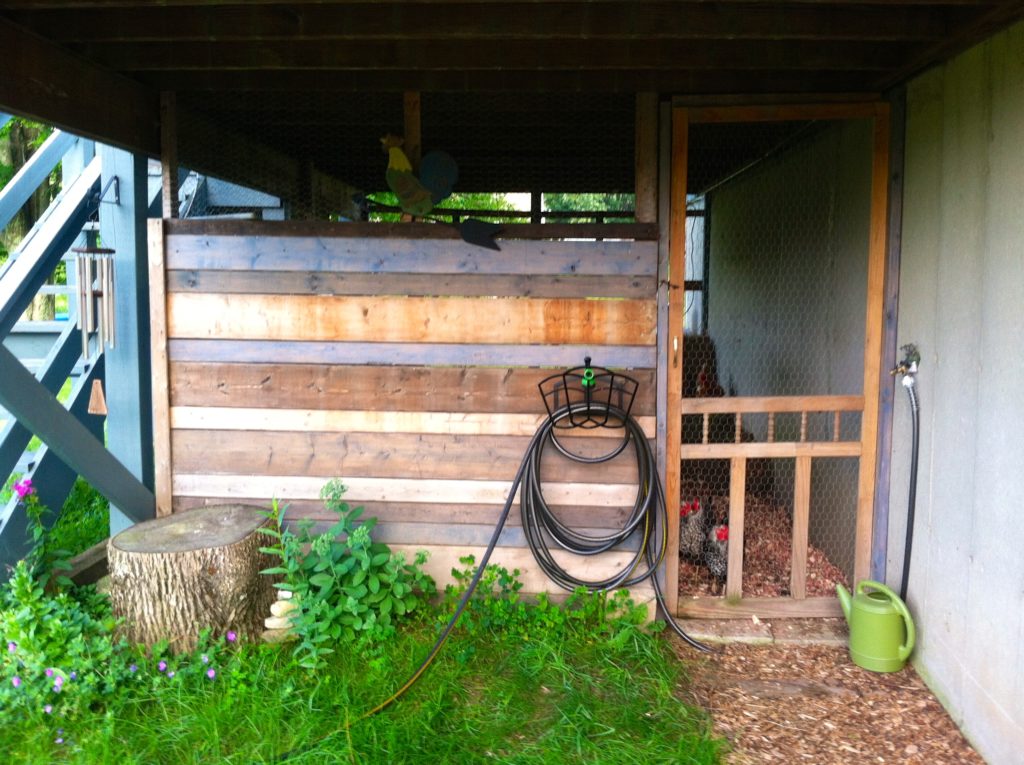
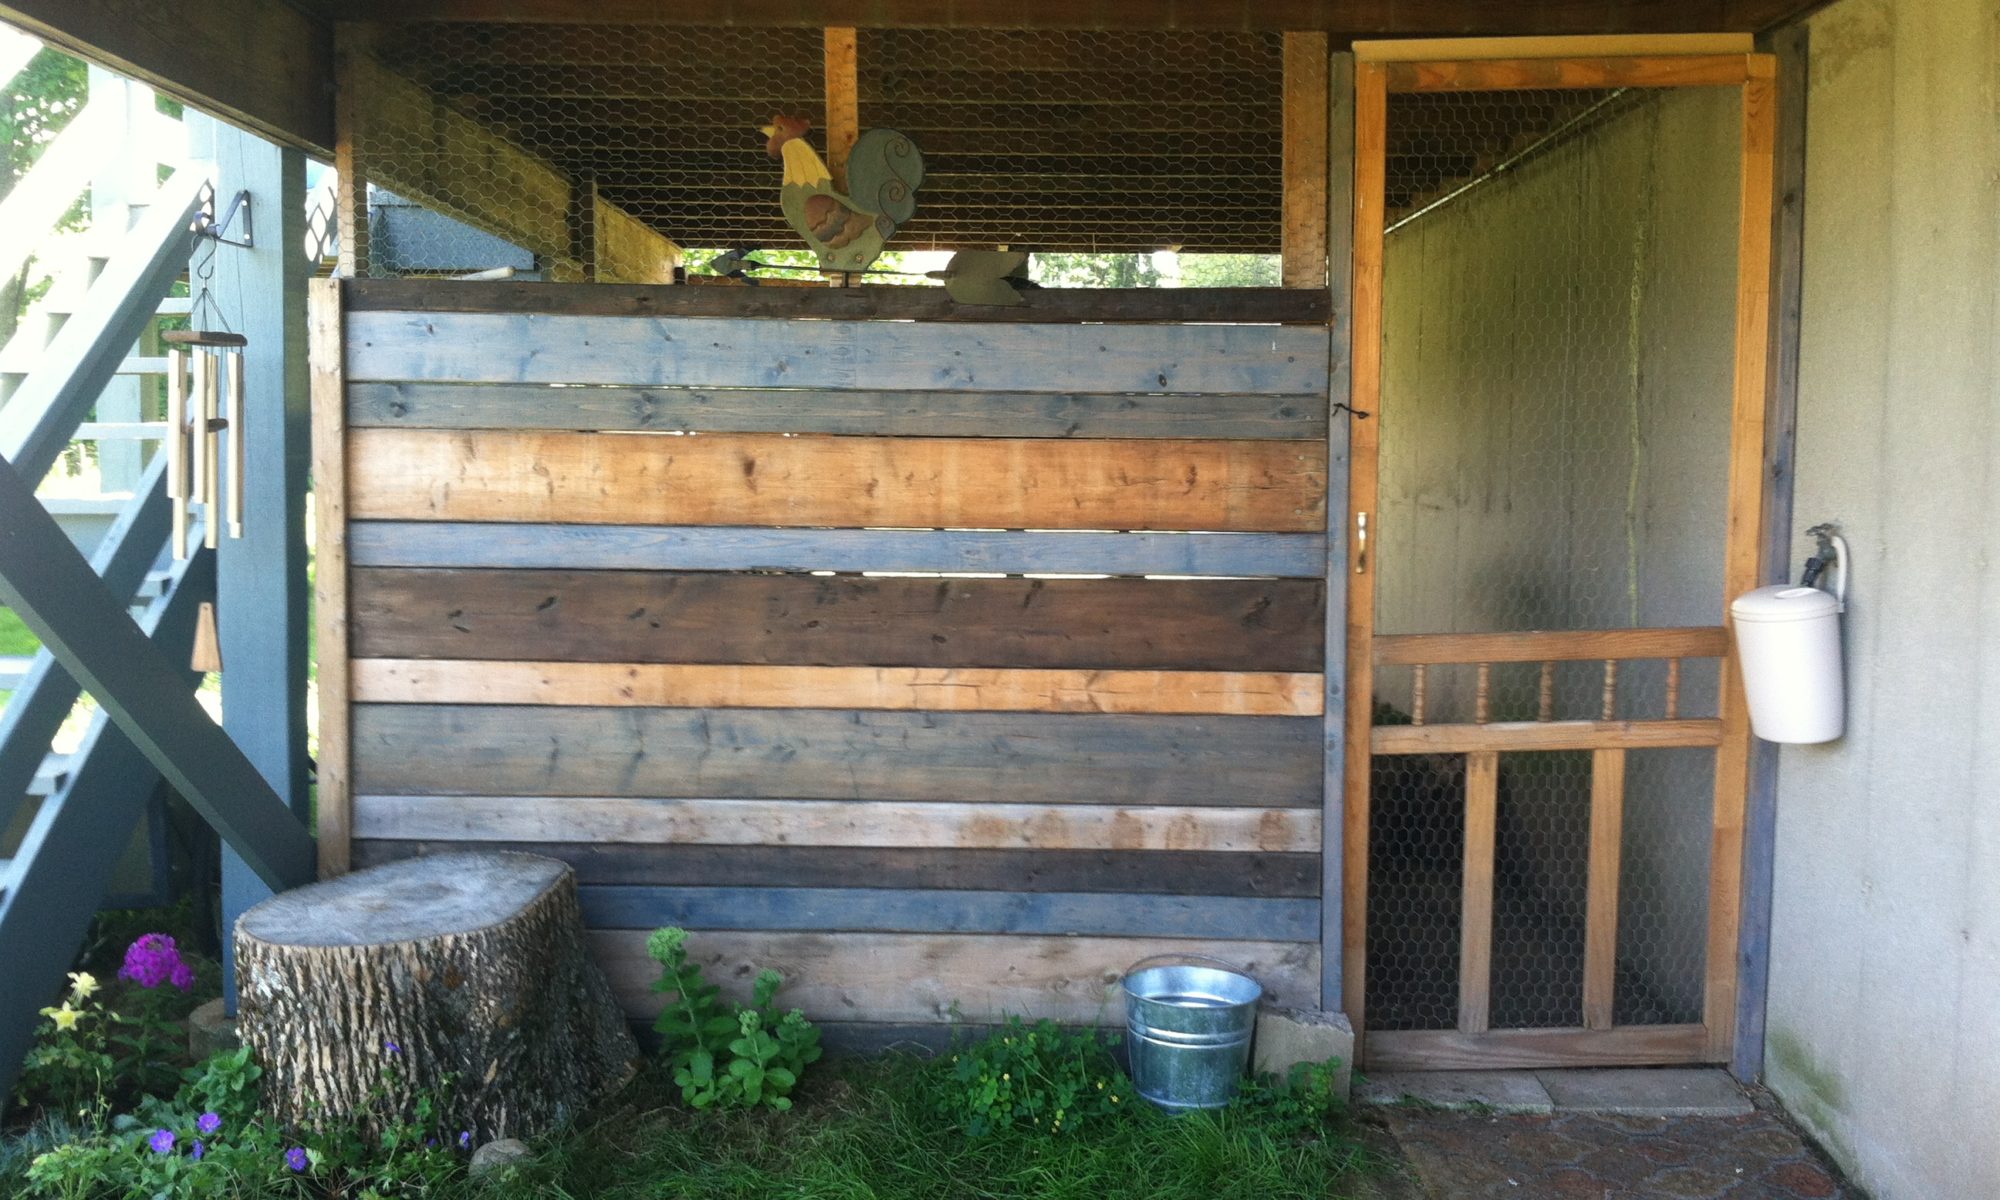
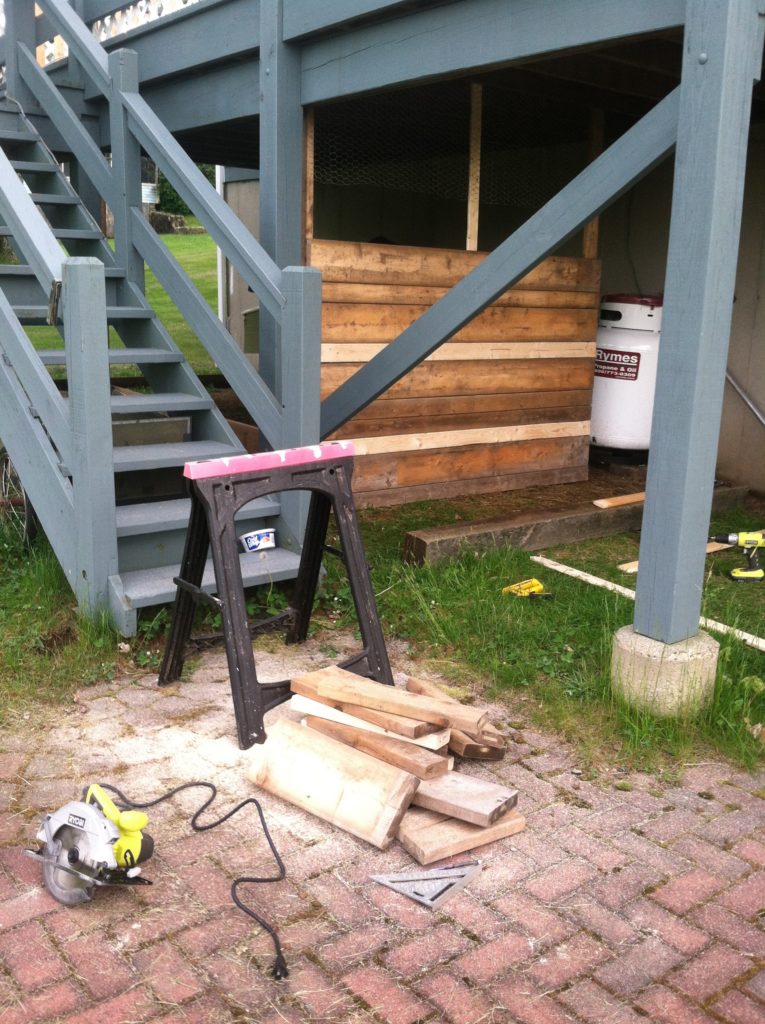
I am one of those lucky individuals whose father hoards construction materials. Wood, saws, measures, hardware…you name it, my father has it laying around his garage or basement. With a quick trip to his house, I had almost everything I needed to get my project off the ground! I started by framing the coop using the pre-existing deck posts as beams. I didn’t do any ground framework but rather set the vertical pressure treated planks a few inches in the ground then screwed them in up top. I measured and allotted for a standard sized door and left this gap between the foundation wall and the windbreak. I added an extra three inches to this measurement to account for water expansion and the 2×4 that would allow me to attach the door to the concrete.
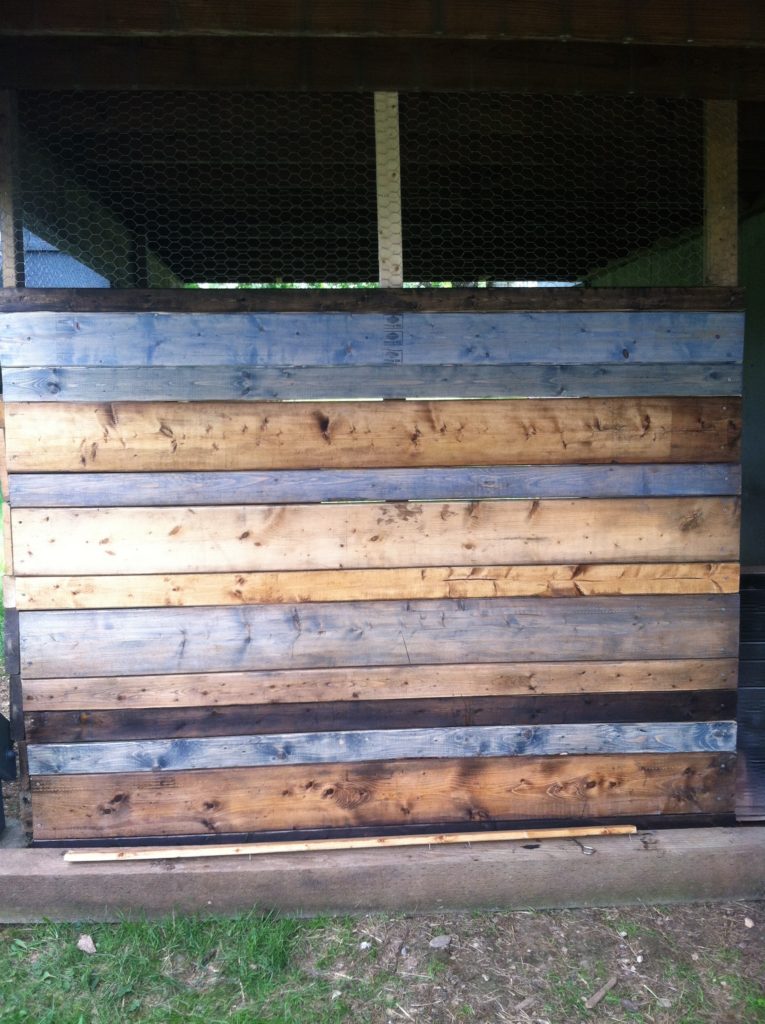
I chose to create a windbreak wall on the northeast sides of the run by lining planks up atop one another and then tucking the coop into that corner. I had already decided to stain the north facing side various shades of natural hues but discovered tinted stains and had to have those too! I purchased two sample size containers of blue hues and went to town. I was more than pleased with the results after a double coat of stain.
After researching DIY doors and recognizing that I neither owned, nor cared to own, a Kreg drill, I opted to buy a pre-made screen door from the local box shop. I found one with a big old chunk missing from the front and asked for a discount which was granted at check-out. Me and the 50% off cosmetically-damaged screen door returned to Sweet Birch for a quick installation.
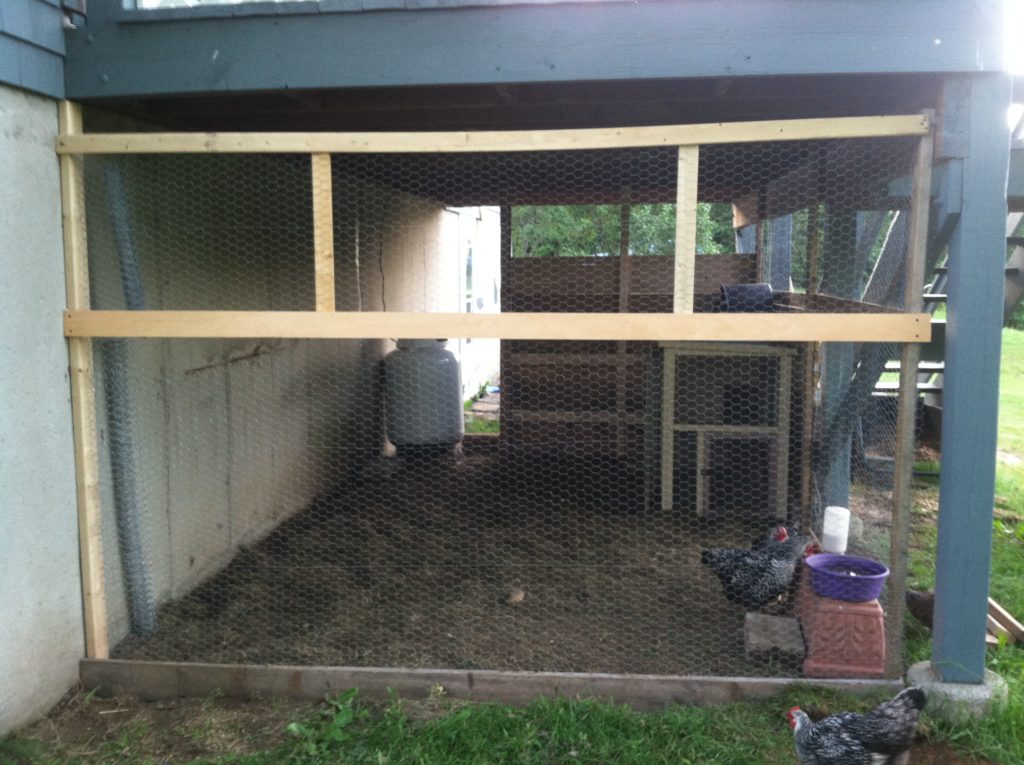
I staple gunned chicken wire from the ground to the ceiling all the way around the coop and suddenly, with one last ca-chink of the gun, the hens were confined! I added a straw bale and a chicken swing, some perches and stumps, and that was that. The grass underfoot was quickly consumed and dirt hollows appeared in corners where the chickens bathed in the late morning sun on the eastern side. A platform to prevent rain from dripping into their food bowls was quickly adopted as a perch to see over the windbreak wall and the hens appeared content in their now permanent location.
I have had the run for a year and a half now and it has required minimal maintenance. The screen door’s flimsy screen material was swapped out for chicken wire and has been great ever since. Every once in awhile an icicle slips between the deck planks and the door and requires some effort, but ultimately I have zero complains about this set up!

I comfortably house 5 hens in my under the deck chicken run with plans on expanding this spring as I bring on some new birds. My idea is that I’ll use the preexisting run and coop for my younger birds and then transition them to a larger outdoor area once they’re laying. Then, come winter, bring the whole flock (I anticipate no more than a baker’s dozen) back to the deck run for ease! I’ll keep you posted with new additions. This was a fun project that I would recommend to anyone comfortable with a circular saw and drill!